Showing posts with label Big Shot. Show all posts

Sunday, April 19, 2015

Control Freaks Tour - Let's Celebrate


I am so glad to be back hopping with the Control Freaks after a break last month! My creative juices haven't been flowing as freely as I have wanted (and needed) them to, but hopefully with the change of weather (we're seeing sunny days here in Oregon!) I can turn my inspiration into production again while the bright light shines through my window! We are so excited to CELEBRATE with you all for this month's tour as we showcase cards and projects meant for celebrating...birthdays, graduation, Mother's Day, and more!

If you've already been hopping along then you just came from the wonderful Melissa Davies' blog. If this is your first stop, then welcome, sit back, and enjoy!

I wanted to share with you a Mother's Day card I created using the Circle Card Thinlits. I love how this simple thinlit creates such a fun and unique card design lickety-split with the creases made for you and everything. With this card I wanted to go a step above and create an extended part of the card (on the right side). I'll show you a quick "how to" for that below. This is definitely not my own idea! I am so thankful for other stampers who encourage me to do things differently!

Here is the card closed (sorry, don't mind my fingers...ha! ha!)


I wanted to take a picture of the card at a different angle, so this is what it looks like propped up. You can see the middle circle start to swing open.


And this is what the card looks like when you open the flap on the right. It reveals the rest of the stamped sentiment! There is also a place for you to write a little message...or at least write who it's from! If you were to pull the left part of the card all the way open the circle in the middle swings all the way open revealing the back side of the circle and then it can lay flat.

Stamp Sets
Mother's Love
Ink
Garden Green
Paper
Pistachio Pudding, Calypso Coral, Crisp Cantaloupe, Gold Soiree Specialty DSP
Accessories
SNAIL Adhesive, Stampin’ Dimensionals, Pearl Accents, Rhinestone Accents, Candy Dots (Regals)
 Tools
Big Shot Die-Cutting Machine, Circle Card Thinlits, Bitty Butterfly Punch, Elegant Butterfly Punch

Start with a piece of cardstock that is 8-1/2" x 5-7/16" (this is just shy of 5-1/2"). This way the left side of the paper can fit just right under the left part of the thinlit and then you can slip it through the thinlit so it goes on the top on the right side. I hope that helps!

It will look like this when cut out.

Fold the left creases...

Fold the right crease...

Now design your card to your heart's content!

http://debbiesdesignsblog.blogspot.com/Thanks for stopping by today! Continue on the tour for more great ideas to help CELEBRATE all of the wonderful people in our lives! Next up is the inspiring Debbie Henderson.

Sunday, September 7, 2014

the creation station blog hop - tags galore


It's the 1st Sunday of the month and that means it's time for another blog hop with The Creation Station! We've got a small group today, but I still hope that you are inspired by what we have to share with you. If you have already been following the hop, you probably came here from Sara's blog.

For today's hop we were able to choose from the following (any or all):
1. Any alphabet stamp from the current catalogs.
2. Theme: Alphabet stamps!
3. Accessory: Tags Punches and/or Dies ~ What fun and creative things can we do with them? Or can you use dies that you wouldn't think could make a tag?

Well...I have to admit something. I don't own any alphabet stamps. Eek!! I know, right? That shouldn't be allowed, but it's true. I am sure that after seeing some of the projects the rest of the designers create I will definitely want to invest in a set (or two!) So, without an alphabet stamp set I was left to consider the third option and that was to work with making tags.

Before I dove into my creation, I wanted to have a PURPOSE for making this tag. So many times I make something to share on the blog, but never end up actually having a plan of who to give it to or what to use it for. I remembered that sometime at the end of last year I actually purchased some pumpkin scented candles on clearance for the reason of using them for teacher gifts for the Fall. (I don't normally have gifts like that picked out so far in advance, but I guess I was in the moment that day with "thinking ahead'.)

I grabbed my Deco Label Framelits and decided they would make a perfect tag!


Using the stamp set For All Things (from the 2014 Holiday Catalog), I made a quick and easy tag I could give to my children's teachers to let them know just how GRATEFUL I am for them! This tag uses the third and fourth largest Deco Labels Framelit. I used Champagne Glimmer Paper for the background. Love how that stuff shimmers in real life! I wanted to keep things neutral so I went for the Natural 5/8" Chevron Ribbon. I used the colors Crumb Cake, Crushed Curry, Pumpkin Pie, and Chocolate Chip.


Well...unfortunately that's all I have for you today!! I wanted to make a few more tags to showcase, but this back to school craziness has thrown me for a loop! I hope that you were inspired even by this simple way to use a framelit to create a one of a kind tag! I am sure you will get lots of other inspiration as you continue on with our blog hop!

Next up is Jennifer Downey at Stamping Lane. Click on the next button below to see what she has to share with us today! If you're following the hop backwards, be sure to click on the back button to head to Sara's blog. Happy hopping!

http://inspiredbyhue.wordpress.com/http://theartfulinker.com/alphabets-tags-and-stampingsunday/

Friday, August 1, 2014

August Big Shot Promotion ~ FREE Bundle with Big Shot purchase or 15% off Framelit Bundles

Today is a SWEET day!! Not only because it's Friday (who doesn't love the start of a weekend?!) but because today is the day Stampin' Up! begins their August Big Shot promotion. Have you been holding out for awhile wondering if the Big Shot is worth the purchase?! Well...I am here to say ~ yes, it is!! Not only because the Big Shot can take a card from drab to flab, but for this month only if you purchase a Big Shot, you will get a Framelit/Stamp Set bundle for FREE (that's up to $60 in additional product for FREE)!!

Already have the Big Shot and loving it? During the month of August you can purchase any of these bundles for an additional 15% off, including a new stamp set that will be featured in the 2014 Holiday Catalog called Bright & Beautiful.


This is exciting stuff and I don't want you to miss out on this opportunity! Please visit my online website to order yours today (heidiboos.stampinup.net)

When ordering your Big Shot and FREE bundle, be sure to use the product numbers as shown below:

CM = Clear Mount
WM = Wood Mount

Bundle
Item Number
Stamp Set
Framelits
Discounted Price
Sumthin' with Bubbly Words Bundle WM
138923
Sumthin' Sumthin'
Word Bubbles
$33.75
Sumthin' with Bubbly Words Bundle CM
138920
Sumthin' Sumthin'
Word Bubbles
$31.25
Decorative Goodies Bundle WM
138924
Oh My Goodies
Deco Labels Collection
$42.25
Decorative Goodies Bundle CM
138921
Oh My Goodies
Deco Labels Collection
$35.95
Celebrating Chalk Talk Bundle WM
138925
Day of Celebration
Chalk Talk
$43.25
Celebrating Chalk Talk Bundle CM
138922
Day of Celebration
Chalk Talk
$37.25
Flowery Daydream Bundle WM
138911
Daydream Medallions
Floral Collection
$54.25
Flowery Daydream Bundle CM
138910
Daydream Medallions
Floral Collection
$45.75
Bright & Beautiful Stars Bundle WM
138644
Bright & Beautiful
Star
$50.75
Bright & Beautiful Stars Bundle CM
138200
Bright & Beautiful
Star
$43.95

Saturday, January 14, 2012

butterflies and birthdays

Remember that goal of mine for the New Year? Less over-thinking the process of making the cards too complicated and more just doing it and actually sending them out! Well, I have good news...I'm on track with that goal! I had a couple of friends I had been thinking about and wanted to send a card to just to let them know that. In the past I would "put it on the list" and most often it just wouldn't get done. Not this time!!

To "get 'er done" and send the card off in the mail, I decided to keep the card simple. I love me some purple, so I reached for this color first.


Stamp Set: Apple Blossoms - sentiment (retired hostess set)
Paper: Wisteria Wonder, Elegant Eggplant, Lucky Limeade, 2011-13 In Colors pack
Ink: Elegant Eggplant
Accessories: Pearl Accents, Stampin' Dimensionals
Tools: Beautiful Wings Embosslits Die (one of my favorites!), *NEW* Adorning Accents Edgelits Die, *NEW* Adorning Accents Textured Impressions Embossing Folder


I added the Dimensionals behind the butterflies to make them "fly" off the page...


I wanted to play with my new "toys" I got from the Occasions Mini Catalog, so I thought this card would be the perfect chance to get out my Adorning Accents Edgelits Die & Textured Embossing Folders to match! The Edgelits die cuts and then the Embossing Folder created the embossed look above the cut. I hope to use these more in future projects. It took a little bit of mastering and I feel like I have a little more to learn yet, but my first time was fun, so I'll get them out again!


* * * * * * * * * * * * * * * * * * * * * * * * * * * * * *

My kids and I went to a birthday party on Friday and sticking with my butterfly kick, I got out my never-been-inked-before Flight of the Butterfly that I had purchased back during the Online Extravaganza in November (I snagged it at 50% off!) It had been on my wish list for awhile, so I knew this was the perfect chance! This is a two-step stamping set, so I got out my Stampamajig to line up everything perfectly...love that thing! If you don't know how to use the Stampamajig and you are a proud perfectionist (like me!) ask me how!!

Another quick and simple card, but perfect for a sweet little 4-year old girl!


Stamp Set: Flight of the Butterfly
Paper: Melon Mambo, Whisper White, Pink Pirouette, Cheerful Treat DSP (hostess exclusive)
Ink: Melon Mambo, Pink Pirouette
Accessories: pink rhinestone brad, Stampin' Dimensionals
Tools: Blossom Bouquet Triple Layer punch


We brought our little 4-year old friend a purse filled with a couple of goodies for a mother-daughter date. I wrote a little poem to go with the gift, typed it up and added a few little flowers to give it a little something extra. I'm pretty sure her mom (my good friend) probably appreciated the poem and gift cards for the date more than she did, but there were a few little goodies in there just for the birthday girl like nail polish and lip gloss. What 4-year old wouldn't want that?


Hope you all have a wonderfully blessed weekend!

Thursday, March 24, 2011

Wednesday workshop

Yesterday I had the pleasure of holding a 3 for $6 stamping get together at my mother-in-law's home for her and her friends. She lives about an hour away, so it's not often that her friends are able to join me for my card making nights or events that I hold at my own home. My mother-in-law holds a weekly Bible study with a group of ladies, so we planned to do some stamping during the day on a regularly scheduled Bible study day. There were a great group of 10 ladies who came to stamp together. Because there are a handful of ladies who live "that way" who are interested in getting together on a regular basis for card nights, I'll be starting a stamp night every other month to be held at my mother-in-law's home. Should be a fun time!

The first card we made was an Easter card...

{I love those pearls!}

Stamp Set: Easter Blossoms (clear mount)

Paper: Pink Pirouette, Certainly Celery, Whisper White, Soft Suede, Pawsitively Prints (pastel version, retired)

Ink: Soft Suede, Crumb Cake

Accessories: Dimensionals, Pink Gingham ribbon (retired), Basic Pearls Jewel Accents

Tools: Scallop Edge Border punch

* * * * * * * * * * * * * * * * * * * * * * * * * * * *

The next card you may have seen HERE before from a workshop I did about a year and a half ago. My mother-in-law really liked it and thought it would be a good one for her friends. On Tuesday, I shared how to make a faux knot in my Tuesday Tip using this card - check it out HERE!

{the butterfly is cut out and "popped up" with a Dimensional}

Stamp Set: Great Friend

Paper: Rich Razzleberry, Old Olive, Whisper White

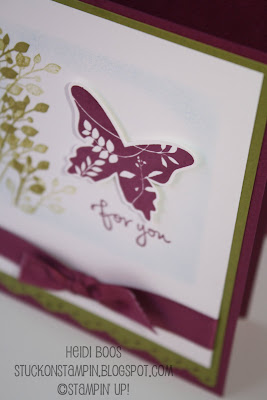
Ink: Rich Razzleberry, Old Olive, Bashful Blue

Accessories: 5/8" Rich Razzleberry Grosgrain ribbon, Dimensionals

Tools: Eyelet Border punch, Paper Snips (used to cut out the butterfly)

* * * * * * * * * * * * * * * * * * * * * * * * * * * *

For the third project, my mother-in-law wanted to make a little treat holder. We made these at our stamp club a couple of months ago. The ladies yesterday had their choice between using Pacific Point or Rose Red. Inside we put Jelly Belly candies.

Stamp Set:
Perfect Punches (clear mount)

Paper: Pacific Point & Rose Red DSP (polka dots), So Saffron, Pumpkin Pie

Ink: Pumpkin Pie, Rose Red

Accessories: 1/2" So Saffron Striped Grosgrain ribbon (retired), 1/2" Pumpkin Pie Striped Grosgrain ribbon (retired), Basic Rhinestones Jewel Accents

Tools: Wide Oval punch, Punch Pack (flower)

* * * * * * * * * * * * * * * * * * * * * * * * * * * *

Don't forget there are only 7 days left until Sale-A-Bration ends! Spend $50 in catalog product and get a free gift! For more information, visit my website HERE.

Wednesday, March 9, 2011

feeling scrappy?

Raise your hand if you're known to keep every little last scrap of paper, especially quality paper like Stampin' Up! cardstock and Designer Series Paper? Both of my hands are raised for sure!! Yesterday I had an urge to do a little something with some of these scraps just for fun! I found a few cute ideas online at Stampin' Connection (a demonstrator only website) and went to work.

I just love the simplicity of the two cards below. With just a few scraps of paper you can make a clean and simple card, but yet still have that "wow" in there! The first card design (in purples and green) I CASED from a card created by Kristin Moore. I kept everything the same, except for I used a different sentiment and added a button instead of the filigree and rhinestone brad she used.

Stamp Set: retired birthday greeting

Paper: Old Olive, Whisper White, Cottage Wall DSP (retired)

Ink: Rich Razzleberry

Accessories: Rich Razzleberry button (adhered with mini glue dot)

Tools: 1 1/4" Square punch

* * * * * * * * * * * * * * * * * * * * * * * * * * * * * *

I loved this card so much that I had to make another one using the current Sunny Garden DSP. Did I mention how quick and simple these cards were to make?!

Stamp Set: retired birthday greeting

Paper: Poppy Parade, Whisper White, Sunny Garden DSP

Ink: Poppy Parade

Accessories: Daffodil Delight button (adhered with mini glue dot)

Tools: 1 1/4" Square punch

* * * * * * * * * * * * * * * * * * * * * * * * * * * * * *

I had so much fun using up some of my scraps that I decided to make another card from an idea I found on Stampin' Connection. This technique I have seen a lot lately with various kinds of Designer Series Paper. I used retired DSP called Cottage Wall.

First I started with my pile of scraps...


I used my 1 1/4" Square Punch to punch out 12 squares of various patterns...


On a 4 x 5 1/4" piece of white cardstock, I arranged my squares until I liked the pattern...


I adhered each of the squares onto the white cardstock...


Then I lined the paper up using my Top Note Die (one of my favorites!) and the Big Shot...


Here is what it looks like after being cut out...


And, here it is made into a card...


Stamp Set: Perfect Punches (clear mount)

Paper: Old Olive, Cottage Wall DSP (retired)

Ink: Rich Razzleberry

Accessories: Dimensionals, 1/4" Old Olive grosgrain ribbon

Tools: Top Note Die, Wide Oval punch

* * * * * * * * * * * * * * * * * * * * * * * * * * * * * *

My mom and I were doing a little stamping together, so while I was finishing up my card, she made herself one using the current DSP called Sunny Garden.


Stamp Set: Perfect Punches (clear mount)

Paper: Poppy Parade, Sunny Garden DSP

Ink: Poppy Parade

Accessories: Dimensionals, 1/8" Daffodil Delight taffeta ribbon

Tools: Top Note Die, Wide Oval punch

* * * * * * * * * * * * * * * * * * * * * * * * * * * * * *

Hope you all have a wonderful day and enjoy digging into your pile of scraps to come up with a fun card for someone special!

Saturday, February 5, 2011

Stamp Club - February

Wow! Time flies...I feel like I was just posting about stamp club not too long ago. We had to postpone last month's stamp club by a week, so there was only a 3 week break in between instead of our usual 4 weeks, so that's probably why it felt like "just yesterday".

I like to go with some sort of theme each month and often times will see what the hostess may want me to share with the group. My friend, Kim, who was the hostess this month let me decide what to do. I knew she owned a Big Shot (Christmas present a couple of years ago!), so I thought I would share some of the fun things that a Big Shot can create!

For the first project, we made a dress using the Scallop Circle Bigz Die. To make the shape of the dress, I counted 4 scallops at the top and 10 scallops at the bottom and then cut it in the shape that I wanted. I made a couple of patterns out of cardboard to have for others to use.


I wasn't satisfied with putting the sentiment on the front of the card (I couldn't figure out where to put it), so I placed it on the inside instead, punched out with the Decorative Label punch and popped up using Dimensionals.

Stamp Set: Apple Blossoms (Level 2 Hostess set)

Paper: Whisper White, Rich Razzleberry, Cottage Wall DSP (retired)

Ink: markers ~ Rich Razzleberry, Old Olive

Accessories: Dimensionals, Whisper White 3/8" Taffeta ribbon, Chocolate Chip flower brads (retired)

Tools: Big Shot, Scallop Circle Bigz Die, Backgrounds 1 Texturz Plates

* * * * * * * * * * * * * * * * * * * * * * * * * * * * * *

For the second project, I went with polka dots! We used the Perfect Polka Dots Impressions Folder (my favorite!) and the Beautiful Wings Embosslits die to create the butterflies. I love how simplistic this card came out and I was inspired by a card I had seen on Stampin' Connection (a Stampin' Up! demonstrators only website). The great thing about this card is that I used my Color Coach to find the color combination...it reminds me so much of a sweet little baby that I used a "Welcome, Baby" sentiment.


Stamp Set: Something to Celebrate (Level 2 Hostess set from 2011 Occasions Mini Catalog)

Paper: Whisper White, Crumb Cake, Chocolate Chip, Pretty in Pink, Wild Wasabi

Ink: Chocolate Chip

Accessories: Dimensionals

Tools: Big Shot, Perfect Polka Dots Textured Impressions Folder, Beautiful Wings Embosslits Die

* * * * * * * * * * * * * * * * * * * * * * * * * * * * * *

The last project (my favorite!) uses the Pillow Box Bigz Die. I just got this die last week and I don't know why I waited so long...I love it! I used a pretty simple design to try it out, but I'm loving the colors. And, as you can see...I had to find candy that matched to put inside! These are the tropical fruit Mike N Ikes...I picked out the turquoise and orange, of course! ;)


Stamp Set: Perfect Punches (clear mount, wood mount)

Paper: Whisper White, Brights Patterns Paper Stack (Tempting Turquoise), Pumpkin Pie (flower)

Ink: Pumpkin Pie

Accessories: Dimensionals, 1/2" Pumpkin Pie striped grosgrain ribbon (retired), Rhinestone Jewel Accents

Tools: Big Shot, Pillow Box Bigz Die

* * * * * * * * * * * * * * * * * * * * * * * * * * * * * *

With the theme being the Big Shot, I thought it would be appropriate to make a hostess gift using the Big Shot. Isn't this the cutest little purse? I filled it with Butterfinger hearts (I knew Kim's favorite candy was Butterfinger). The tutorial for this purse is from the talented Becky Roberts at Inking Idaho. I didn't have the grommets for the top of the purse where the ribbon handle goes, but I did my best to improvise...although I do wish I would have put the holes further apart.


Stamp Set: none

Paper: Pretty in Pink, Sending Love Specialty paper (but it can stil be found in the Clearance Rack)

Ink: none

Accessories: 1/2" Pretty in Pink Satin Ribbon, Pretty in Pink heart brad (retired), glue dots (to adhere flowers), Velcro (to hold purse lid closed), Sticky Strip

Tools: Big Shot, Scallop Circle Bigz Die, Top Note Bigz Die (exclusive to Stampin' Up!), 5 Petal Flower punch, Paper Piercing Tool & Mat Pack

* * * * * * * * * * * * * * * * * * * * * * * * * * * * * *

Interested in being a part of my monthly stamp club? We will finish off the current one in May and I hope to start a new one once the new catalog debuts this summer in July. The club will most likely start up in October like I did with this last one. Ask me for more information!

Monday, July 6, 2009

Deal #2 - - the perfect little bag

To celebrate the new catalog that was released July 1st, Stampin' Up! is offering a special deal each week during the month of July. They will not disclose the new deal of the week until the previous week is finished. Last week the deal was the Scallop Edge Punch being sold for only $10.99 (that's over a 30% savings!) Some of my fellow stampers took me up on the special offer and I know they will be happy that they did because it's such a great little tool that can help pretty up a card or any crafty creation.

This week's deal starting today through July 13th, is the Doctor's Bag used specifically to carry the Big Shot die cut machine. The Doctor's Bag normally runs for $69.95, but is now on sale for $49.99. This is over a 30% savings!!

**Description from the Stampin' Up! website: Carry your Big Shot machine, cutting pads, and dies in stunning style. This black-and-white checked doctor’s bag makes storing and transporting your Big Shot machine easy and convenient. It has handles for carrying and a shoulder strap for when your hands are full of other crafting supplies.

I don't have the Big Shot machine, but I'm still thinking about getting this bag! The Big Shot is on my Christmas list, and I would love to have a great little bag to carry it with me to my workshops and events. (Of course...if I actually get the Big Shot for Christmas -- hint, hint, mom!)

Please contact me if you are interested in purchasing the Doctor's Bag at this discounted rate. Or if you're interested in purchasing the Big Shot, we can chat more about that, too!

Since we're talking about the Big Shot...

I thought I would share with you some of the cards I have made using the die cut machine that my friend let me borrow a month or so ago.

My favorite two dies that I played around with were the Scallop Circle #2 Bigz Die and the Top Note Bigz Die.

Here's what I came up with for fun using the Scallop Circle...

**All products listed are Stampin' Up! unless otherwise noted

{this particular card was used for my card making night}

Paper: Old Olive, Whisper White, Pacific Point (retired), Good Morning Sunshine DSP (retired)
Stamp Sets: Cheep Talk, sentiment from On Your Birthday
Ink: Pacific Point (retired), Summer Sun, Chocolate Chip, Stampin' Write Markers: Old Olive, Pumpkin Pie, Chocolate Chip
Accessories: Pacific Point 5/8" grosgrain ribbon, green brad (non-SU!)
Tools: scallop edge punch, Scallop Circle #2 Bigz Die

**********************************************


Paper: Whisper White, Kiwi Kiss (retired), Pacific Point (retired), Good Morning Sunshine DSP (retired)
Stamp Sets: Cheep Talk, sentiment from Really Retro
Ink: Pacific Point (retired), Summer Sun, Chocolate Chip, Stampin' Write Markers: Old Olive, Pumpkin Pie, Chocolate Chip
Accessories: Pacific Point 5/8" grosgrain ribbon, green brad (non-SU!)
Tools: Scallop Circle #2 Bigz Die

**********************************************


Paper:
Whisper White, Kiwi Kiss (retired), Pacific Point (retired), Summer Sun, Good Morning Sunshine DSP (retired)
Stamp Sets: Party Hearty
Ink: Pacific Point (retired)
Accessories: Pacific Point 5/8" grosgrain ribbon
Tools: Scallop Circle #2 Bigz Die, scallop circle punch

**********************************************
Here's what I came up with for fun using the Top Note Die...

**All products listed are Stampin' Up! unless otherwise noted


Paper: Whisper White, Pacific Point (retired), Good Morning Sunshine DSP (retired)
Stamp Sets: Cheep Talk
Ink: Pacific Point (retired), Summer Sun, Stampin' Write Markers: Old Olive, Pumpkin Pie, Chocolate Chip
Accessories: green brad (non-SU!)
Tools: Top Note Bigz Die

**********************************************


Paper: Whisper White, Apricot Appeal, Certainly Celery, Bashful Blue, Bashful Blue DSP
Stamp Sets: Cheep Talk, sentiment from On Your Birthday
Ink: Apricot Appeal, Cameo Coral, Pumpkin Pie Stampin' Write marker
Accessories: green brad (non-SU!)
Tools: 1 3/8" circle punch, scallop circle punch, Top Note Bigz Die


**********************************************


Paper: Whisper White, Pink Pirouette (retired), Sweet Always DSP (retired)
Stamp Sets: On Your Birthday
Ink: Chocolate Chip
Accessories: 5/8" grosgrain ribbon
Tools: Top Note Bigz Die, Flower Layers #3 Original Die

**********************************************

{these particular cards were used for my card making night}

Paper: Whisper White, Cameo Coral, Tempting Turquoise
Stamp Sets: Seeing Spots (retired)
Ink: Cameo Coral, Tempting Turqouise
Accessories: silver brad (non-SU!), Tempting Turquoise 1/4" grosgrain ribbon, stampin' dimensionals
Tools: 1 3/8" circle punch, 1 1/4" circle punch, scallop circle punch, Top Note Bigz Die


WHEW! I guess you could say I was trying hard to use the machine while I had it! Now do you see why I want the Big Shot!?
// ADDED BY RYAN ON 1-3-14 // END ADDED BY RYAN 1-4-14