
 It's time for another blog hop tour with the Control Freak Stampers...I hope you enjoy what you see today on our blogs! If you started from the beginning of the hop, you should have come from Justin Krieger's blog. Doesn't he always blow you away with his attention to detail?
This month's theme is "New Catalog Goodness". The catalog has been out for a little over 2 weeks now and there are so many awesome products just waiting to be played with! There was so much to choose from in what I wanted to share today, but I decided to set my focus on the exciting new Project Life products by Becky Higgins...now available through Stampin' Up! I have really been wanting to get back into scrapbooking and I am excited for Project Life to help kick start that!
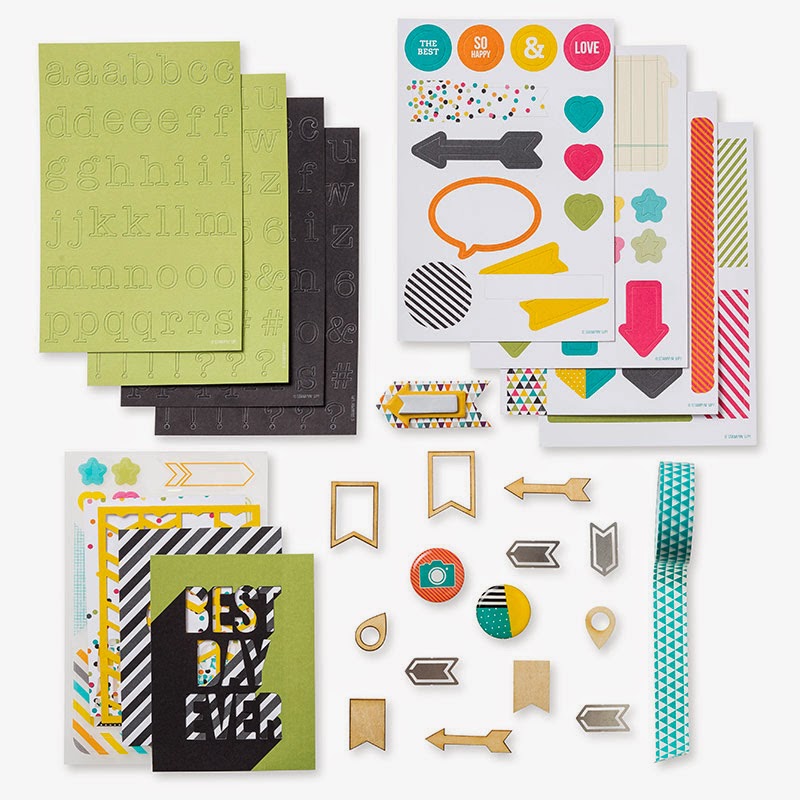
I created today's layout using some of the products from the Everyday Adventure Project Life Card Collecton & Accessory Pack. I also used a couple of images from the Project Life Day to Day Photopolymer Stamp Set and Project Life Point & Click Photopolymer Stamp Set.

My daughter had her dance recital last weekend and I thought these would be the perfect pictures to put a layout together. I kept it pretty simple, but as I get a little more used to this way of scrapbooking I look forward to adding more embellishments and extra touches to my pages.


I knew I wasn't done with just one scrapbook page, so I decided I would use the Project Life Card Collection to create a quick card, too! I have been wanting to make a shaker card for awhile now and when I saw this card from the collection...

...I just knew I had to make a confetti card!
I also used a card from the Accessory Pack (forgot to take a picture of just that!). It already had a heart pre-cut from the middle, so I knew that all it took was a piece of Window Sheet and a Shaker Frame. I cut apart the largest circle of the shaker frame and "molded" it around the heart after adhering the window sheet to the back of the card.

I then used my handheld hole punches (1/4" & 1/8") to punch out coordinating colors that would match the confetti card and made my own "confetti"! I used the colors Pear Pizzazz, Bermuda Bay, Strawberry Slush, Pumpkin Pie & Crushed Curry.

I put the "confetti" inside the heart then I peeled the adhesive backing of the shaker frame. Make sure to do that part last, so everything doesn't stick to it!

This picture shows you the back of the card I was using (it's 2-sided so you always have options!). I placed onto the back of where the shaker frame was so the confetti stayed in one place.

I adhered it to a Strawberry Slush base and added a trio of rhinestones and bow of Strawberry Slush thick Baker's Twine to finish it off!

{Shake that confetti!}

Thank you again for taking the time to hop along today. I hope you were inspired! Keep in mind that the Project Life cards can be used for more than just scrapbooking! As you can see, they work for a quick card in a pinch!
 Please continue to hop along with the Tour de Freaks. Next stop is Judy DiScipio at Judy Stamps.
 Control Freaks Blog Hop List
- Wendy Weixler at Wickedly Wonderful Creations
- Mary Brown at Stamper Camper
- Patty Bennett at Patty Stamps
- Cindy Elam at Heart's Delight Cards
- Debbie Henderson at Debbie's Designs
- Melissa Davies at Rubberfunatics
- LeeAnn Greff at Flowerbug's Inkspot
- Julie Davison at Julie's Stamping Spot
- Justin Krieger at JK Cards
- Heidi Boos at Stuck on Stampin' (you are here!)
- Judy DiScipio at Judy Stamps
- Connie Babbert at Inkspired Treasures


