Showing posts with label 12 Days of Christmas. Show all posts

Monday, December 12, 2011

12 days of Christmas {projects} - day 12...and a giveaway!!

Christmas Project #12
Jumbo Clothespin - Picture Holder

Day 12 is here! I actually can't believe that 12 days have gone by...it seemed so quick! My final project of this Christmas series is one that I made for my MOPS (Mothers of Preschoolers) group. This is my second year of being a discussion group leader and I like to do a little something for them each month. Each of the ladies will receive one of these jumbo clothespin holders that can be used as a picture holder. I have also printed a picture of our group that I will stick on the clothespin before they arrive! (Let's hope that none of my group decides to read my blog before coming to MOPS this morning and spoil the surprise!)


Let's get started!

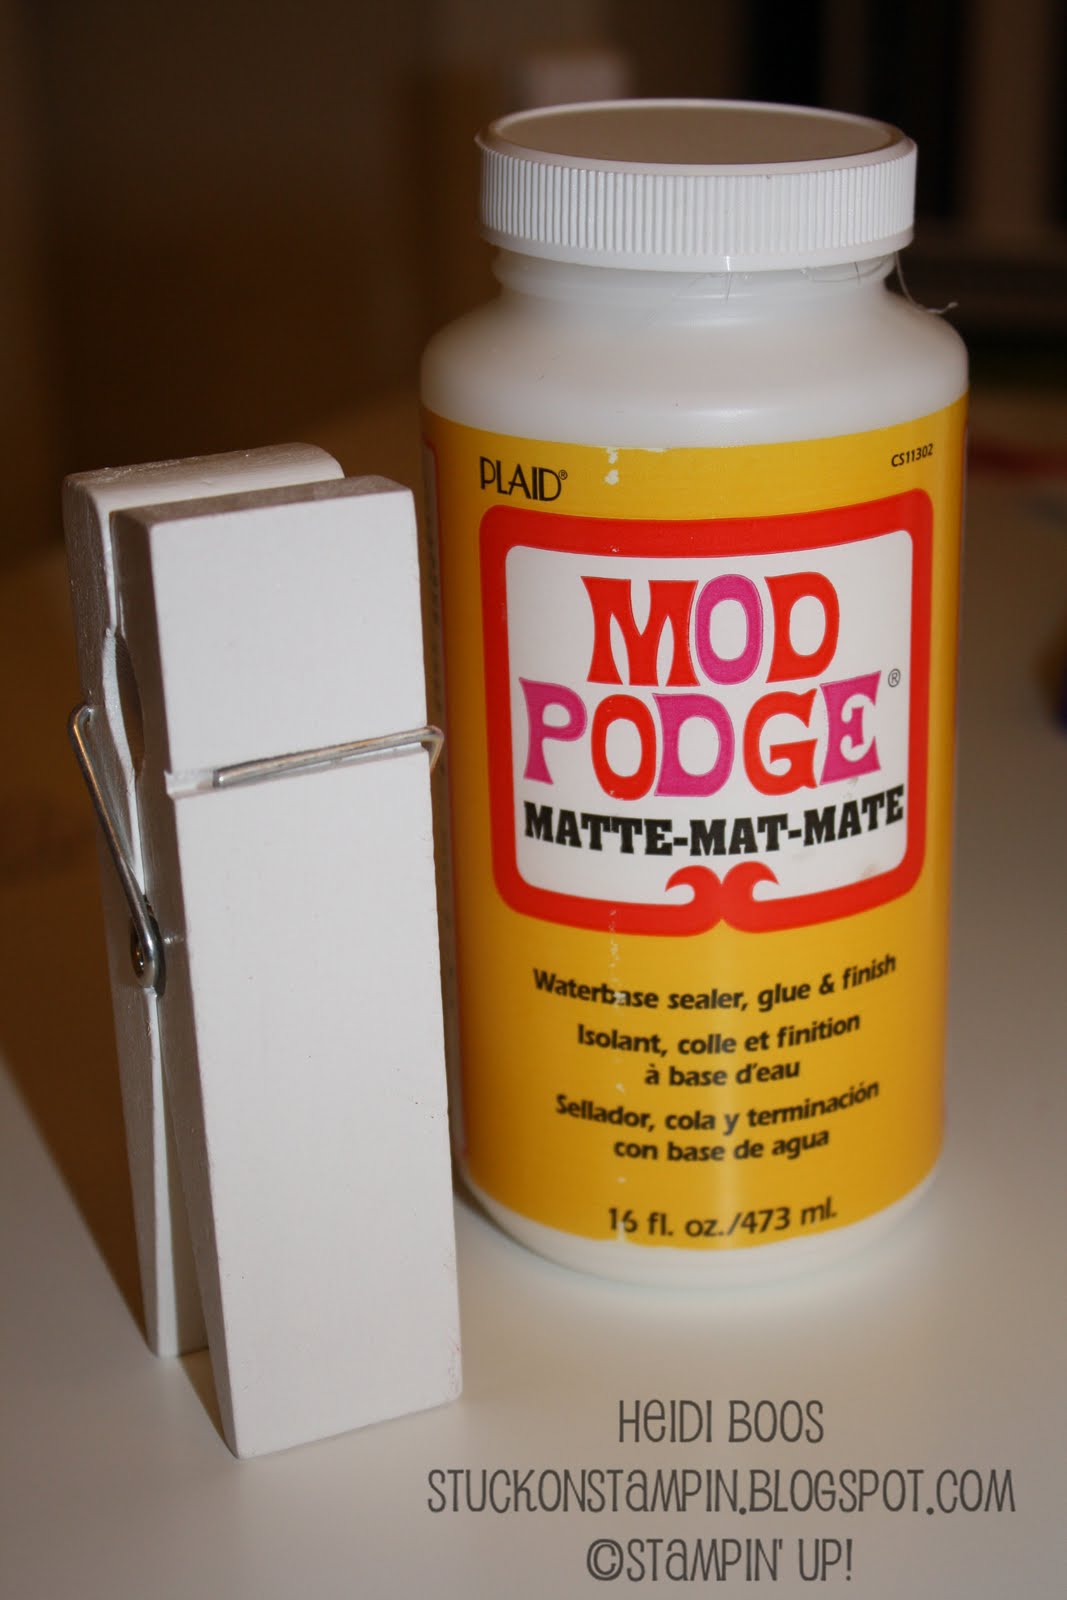
Find yourself a jumbo clothespin (I found mine at Michaels) and get out your Mod Podge. If you don't have any...you really need to get some! I pull out my big jar of Mod Podge for little projects here and there and I am always so glad I have some on hand.

Cut two pieces of DSP (I used retired Candy Cane Christmas):
1-1/8 x 3-5/16

1-1/8 x 1-1/16
Keep in mind that the clothespins you have or find may not be the same size.
I stamped the JOY ornament from the Delightful Decorations stamp set onto Whisper White card stock using Real Red ink. I punched it out with the Ornament punch.

Using a foam paint brush, brush Mod Podge over the top of the clothespin.

Lay your two pieces of DSP over the Mod Podge, smooth with your finger, and then brush another layer of Mod Podge on top. Set aside to let dry.

Adhere Dazzling Diamonds glitter to the ornament starting with the 2-Way Glue Pen...

Then generously sprinkle on Dazzling Diamonds glitter and shake off excess. Allow to dry for a few minutes.

Punch a hole in the top of the ornament using a 1/16" hole punch.

Cut a 10" piece of white floss and break into two pieces (3 strands each).

Thread through the back of the ornament and then thread to the front 2 Mini Jingle Bells.

These mini jingle bells are only available until January 3rd out of the 2011 Holiday Mini Catalog. Aren't they so cute?

Thread a 10" piece of 5/8" Real Red Satin ribbon through the hole of the clothespin.

Tie into a double knot.

Thread the floss up through the red ribbon.

Tie the floss into a double knot and then make a bow. Trim the ends of both the floss and the satin ribbon for a completed look.

Add you favorite picture and count it all JOY!


I hope you have enjoyed these simple, but cute projects that are easy to recreate so that you are able to still do a "handmade holiday", but can also have more time during the busy Christmas season! I hope that you are able to bless someone with your talent and gift of creativity!

Now onto the GIVEAWAY!!!

One lucky reader will receive these treat from me...

You will probably recognize that many of the things pictured are items you have seen during my 12 Days of Christmas {Projects}.


To enter to win:

LEAVE A COMMENT ON THIS POST...
telling me which project of the 12
I shared with you is your FAVORITE!

{giveaway will end on Thursday, December 15th at 8:00 PM...
I will announce the winner on Friday morning!}


Please be so kind and share this giveaway with your friends and family and I would love to be able to pass these projects onto anyone who would like to use them and sharing my blog with others can help do that! It's my gift to my fellow crafters this Christmas season!

Thank you to those who come to visit me daily...I hope you continue to come by and I will continue to share more creations and inspirations! Many blessings to you and your family this Christmas!

************************

Day 1 - M & M's Skinny Bag with Matching Tag
Day 2 - Rudolph Punch Art Gift Card Holder
Day 3 - Santa Suit Jars
Day 4 - Hershey Nugget Trays
Day 5 - Holiday Hand Sanitizer Ornaments
Day 6 - Wrapped Rolos
Day 7 - Merry Trees Glass Block with Snow
Day 8 - Snowman Kisses
Day 9 - Ghiradelli Chocolate Holder
Day 10 - Jingle All the Way Shadowbox Frame
Day 11 - Candy Hugs & Kisses Treat Holder


Sunday, December 11, 2011

12 days of Christmas {projects} - day 11

Christmas Project #11
Candy Hugs & Kisses Treat Holder

Here's a simple little treat holder you can pull together really quick and you don't need much on hand. Sometimes when I'm searching for treat holder ideas on different blogs and websites, I just want something simple and quick that doesn't use a lot of dies, punches, etc. This one will do the trick and you can decorate the front however you'd like!


Start with a piece of Real Red card stock 3-1/2" x 8-1/2" (you can get three of these treat holders out of one piece of cardstock!)
Score lengthwise at 3, 5, and 8 inches.

Fold on each of the score lines.
To decorate the front I used Real Red marker to color in the "dec. 25" part only on the stamp from the Tags Til Christmas stamp set. I then stamped it onto Very Vanilla card stock.

I punched out the "dec. 25" with the Large Oval punch and also punched out a Real Red Scallop Oval and Garden Green Decorative Label. The DSP (Holly Berry Bouquet) is cut 1-1/2 x 3-1/2.

Using SNAIL adhesive, adhere the DSP to the front of the holder, making sure it is on the side with the top "flap".

I attached the "dec. 25" with SNAIL adhesive to the Real Red scallop oval and then used a Dimensional to attach it to the Garden Green decorative label. The decorative label is attached to the front using two Dimensionals.

Place some Hershey's Hugs & Kisses into a small baggie (I find these in bulk at Paper Zone) and fold over at the top.

Line it up to the top, and center it.

Fold the flap over the back.

Punch two holes using 1/8" Circle punch about 3/4" apart (this will also punch through the baggie).

Thread a piece of 5/8" Real Red Satin ribbon from behind to the front.

Make a pretty bow!

You'll see the candy kisses from the side view.

Hope to see you tomorrow for the last project...and a giveaway!!

Blessings to you and I hope you've had a wonderful weekend!


************************

Day 1 - M & M's Skinny Bag with Matching Tag
Day 2 - Rudolph Punch Art Gift Card Holder
Day 3 - Santa Suit Jars
Day 4 - Hershey Nugget Trays
Day 5 - Holiday Hand Sanitizer Ornaments
Day 6 - Wrapped Rolos
Day 7 - Merry Trees Glass Block with Snow
Day 8 - Snowman Kisses
Day 9 - Ghiradelli Chocolate Holder
Day 10 - Jingle All the Way Shadowbox Frame

Saturday, December 10, 2011

12 days of Christmas {projects} - day 10

Christmas Project #10
Jingle All the Way Shadowbox Frame

Hi there! I meant to get this posted before the busy weekend began, but for some reason I just couldn't squeeze it in! But, here I am (it's Sunday) and I'm now trying to catch up. Anyone else feel like they're always two steps behind during the Christmas season?

I wanted to share with you all a project I created about 2 years ago using the small Jingle All the Way vinyl from Stampin' Up's Decor Elements line. The small vinyl only costs $3.50!


This project included a square shadowbox frame, some jingle bells, a piece of Christmas paper, a piece of ribbon, and the vinyl above and they all combined to make a fun piece of Christmas decor.

I just knew I should have taken a picture of each of the four designs I made for this year's craft bazaar (I used different paper for each one). However, I didn't and all four sold out!! Here is one sample I caught a picture of. (This is NOT Stampin' Up! DSP in the background.)


Here is a picture of two others that I had for sale at last year's craft bazaar. Both of the DSP in the background are retired Christmas paper from Stampin' Up!


And here is the original frame I created 2 years ago. At that time they had black, red, and green vinyls available to purchase, so this one uses Old Olive. (The DSP in the background is NOT SU!)


For a "how to" for this frame, please visit my ORIGINAL TUTORIAL I put together 2 years ago on my personal blog. At that time, I hadn't started my Stampin' Up! blog yet.

Only 2 more days left of the 12 Days of Christmas {Projects} and definitely be sure to visit on Monday, the 12th for a giveaway and the final project in the series!

************************

Day 1 - M & M's Skinny Bag with Matching Tag
Day 2 - Rudolph Punch Art Gift Card Holder
Day 3 - Santa Suit Jars
Day 4 - Hershey Nugget Trays
Day 5 - Holiday Hand Sanitizer Ornaments
Day 6 - Wrapped Rolos
Day 7 - Merry Trees Glass Block with Snow
Day 8 - Snowman Kisses
Day 9 - Ghiradelli Chocolate Holder


Friday, December 9, 2011

12 days of Christmas {projects} - day 9

Christmas Project #9
Ghiradelli Chocolate Holder

This next project is an idea I got from the talented Jill at Jill's Card Creations last Christmas. I made about 20 of them for this year's craft bazaar. I purchased the Peppermint Bark Ghiradelli Chocolates to use inside each of the holders...I love peppermint bark!

Please note: For the craft bazaars I participate in, I typically try to use up retired DSP and save the current DSP for events that I host. Therefore, this is the reason many of these projects I am posting in my 12 Days of Christmas {Projects} uses retired DSP. Any of these projects can be easily changed with current DSP, if desired!


Cut a piece of Garden Green card stock 3" x 8".
Score lengthwise at 3-14/16" and 4-2/16"

Open the piece of paper all the way and slip the Word Window punch into the paper until you can't go any further. You will want it off centered a bit.

The chocolate will not fit with only one punch...

Place the Word Window punch in again as far as it will go and then move it a little to the right.

Fold up the paper so the pieces are together. Using the 1/8" Circle punch make two holes about 1/4" apart.

To decorate the front, I used a piece of striped DSP (from retired Candy Cane Christmas) cut 1-12/16" x 2-14/16"and two strips using the Dotted Scallop Ribbon Border punch (2-14/16" in length). I also used a sentiment from the Sweet Season stamp set and punched it out with the Decorative Label punch.

You will need an 11" piece of thin ribbon (I used 1/8" Real Red Taffeta ribbon). Thread through the back and then tie into a bow.

Pull out the treat...and eat! ;)

Have a wonderful weekend!

************************

Day 1 - M & M's Skinny Bag with Matching Tag
Day 2 - Rudolph Punch Art Gift Card Holder
Day 3 - Santa Suit Jars
Day 4 - Hershey Nugget Trays
Day 5 - Holiday Hand Sanitizer Ornaments
Day 6 - Wrapped Rolos
Day 7 - Merry Trees Glass Block with Snow
Day 8 - Snowman Kisses

Thursday, December 8, 2011

12 days of Christmas {projects} - day 8

Christmas Project #8
Snowman Kisses

Anybody wondering when Day 8 was going to appear? ;)

For today's project I wanted to do a "revamp" of a little project that I have done for the past two Christmas seasons, but this time using a current stamp set. By no means is this project something I came up with all on my own (I have seen it a little here, there, and everywhere for the last couple of years), but I did figure out the dimensions and made my own design and so I would like to pass those on to you to make it easier for you to re-create!

I present to you my little Snowman Buddy bringing you some snowman kisses...


You'll need to start with a Tic Tac "Big Pack" in white...

Cut a piece of Baja Breeze card stock 3" x 4-1/2" and round all four corners with the 3/16-inch Corner Rounder punch.Link

Score at 1-15/16" and 2-10/16"

Cut a piece of Whisper White card stock 1-6/8" x 2-13/16" and round two of the corners on the right. (please note: do not adhere it to the blue yet as shown below...I am just showing you how the white fits inside the front cover)

Sponge edges with Baja Breeze ink. Using the snowflake from the Season of Friendship stamp set, stamp off some of the snowflakes to make them lighter. I stamped once on a scrap piece of paper and then again on the cut piece making a softer look. If desired, stamp more snowflakes with full ink on top.

Using the snowman from the Button Buddies stamp set, ink up the image with markers...Basic Black, Chocolate Chip (for arms), Pumpkin Pie (for carrot nose). Stamp onto the white card stock near the top. Set aside.

With a 14" piece of ribbon (I used retired Red Gingham), fold the scored piece of Baja Breeze and line up your ribbon to be even on the right.

With SNAIL adhesive, adhere the ribbon ONLY TO THE FRONT "COVER" (not the spine or back).

With SNAIL adhesive, adhere the finished snowman to the front cover (over the ribbon). You'll notice I have already added the special details to the snowman (Dazzling Diamonds glitter, scarf, and Rhinestone on hat). I had to "retake" this picture, but my first attempt I added all of those details last.

Using your 1" Circle punch, punch a hole at the bottom, overlapping a little on the second circle.


Attach Sticky Strip to the spine of the pack of Tic Tacs.

Adhere to the inside spine of the card stock.

I added a fun tag with my Tiny Tags stamp set and coordinating Jewelry Tag punch.

To make it complete, on the inside I added this poem (I wish I could say I made this up, but I didn't!)...

I have made these for the last couple of years for the annual craft bazaar I participate in...

2009

2010
Although I didn't have these at my craft bazaar this year, I just knew I needed to share him with you, but update it a little. It's funny how the snowman has progressed over the years.

Thanks for hanging in there with me on Day 8 coming a bit late. Sometimes life just gets in the way of my stamping...how dare it?! ;)

Hope you are all enjoying a beautiful Christmas season. The weather here in Oregon has been gorgeous so far! I am loving the blue sky days and even though there's cold air...there's no rain and gloominess! I could do this all winter...and maybe add a little snow in there, too!

Only 4 more days of my 12 Days of Christmas {Projects}...and I'll see you on the 12th for a giveaway! Please forward this to a friend if they're interested in some quick, fun, and cute ideas as Christmas draws nearer.

************************

Day 1 - M & M's Skinny Bag with Matching Tag
Day 2 - Rudolph Punch Art Gift Card Holder
Day 3 - Santa Suit Jars
Day 4 - Hershey Nugget Trays
Day 5 - Holiday Hand Sanitizer Ornaments
Day 6 - Wrapped Rolos
Day 7 - Merry Trees Glass Block with Snow
// ADDED BY RYAN ON 1-3-14 // END ADDED BY RYAN 1-4-14