Tuesday, October 19, 2010

Handmade Holiday - special prices on holiday bundles!


It's time to prepare for your holiday gift giving! Create Amazing cards, Beautiful packaging, and Cherished gifts this holiday season. Stampin' Up! has come up with some "holiday bundles" to help make it easier {and cheaper} for you to order exactly what you need for you to create beautiful gifts to give...and all at 20% off.

There are 6 HOLIDAY BUNDLES to choose from ~

Vintage Christmas Card Bundle
Bells & Boughs Set & Deck the Halls Designer Series Paper
Wood Mount (124067) - $23.92
Clear Mount (124068) - $19.92

reg. price - $19.95 (wood), $14.95 (clear)

reg. price - $9.95* * * * * * * * * * * * * * * * * * * * * * * * * * * * *

Contempo Christmas Card Bundle

Contempo Christmas Set & Jolly Holiday Designer Series Paper
Wood Mount (124071) - $20.72
Clear Mount (124072) - $17.52

reg. price - $15.95 (wood), $11.95 (clear)

reg. price - $9.95

* * * * * * * * * * * * * * * * * * * * * * * * * * * * *

Tags til Christmas Bundle
Tags til Christmas Set & Decorative Label Punch
Wood Mount (124077) - $38.32
Clear Mount (124078) - $31.92

reg. price - $30.95 (wood), $22.95 (clear)
reg. price - $16.95

* * * * * * * * * * * * * * * * * * * * * * * * * * * * *


Gift Packaging Bundle
Gifted Set & Mini Lunch Sacks (10/pkg.)
Wood Mount (124083) - $26.32
Clear Mount (124084) - $19.92

reg. price - $27.95 (wood), $19.95 (clear)
reg. price - $4.95

* * * * * * * * * * * * * * * * * * * * * * * * * * * * *


Simply Adorned Gift Bundle
Charming Set,
Simply Adorned 1" x 1-1/4" Charm,
and Simply Adorned 24" Chain
(124076) - $39.88

{click on picture below for more details}

* * * * * * * * * * * * * * * * * * * * * * * * * * * * *


Frame Gift Bundle

Definitely Decorative Chunky Frame &
Small Chocolate Chip Dotted Flourish Décor Elements
(124075) - $19.92

{click on picture below for more details}

These holiday bundle prices are good October 19th - December 16th. You may purchase them online at my Stampin' Up website - heidiboos.stampinup.net (be sure to use the product numbers listed above) or contact me by e-mail (heidilynneboos{at}homtail{dot}com) to place your order today!

Saturday, October 16, 2010

A "Fairy" Fun Birthday Party!

I was honored to be asked by a friend of mine to be the "craft lady" at her daughter's 7th birthday party. I was so excited because I knew that not only would it bring me back to my teaching days, but I love being able to create some fun projects for kids.

We made two projects:

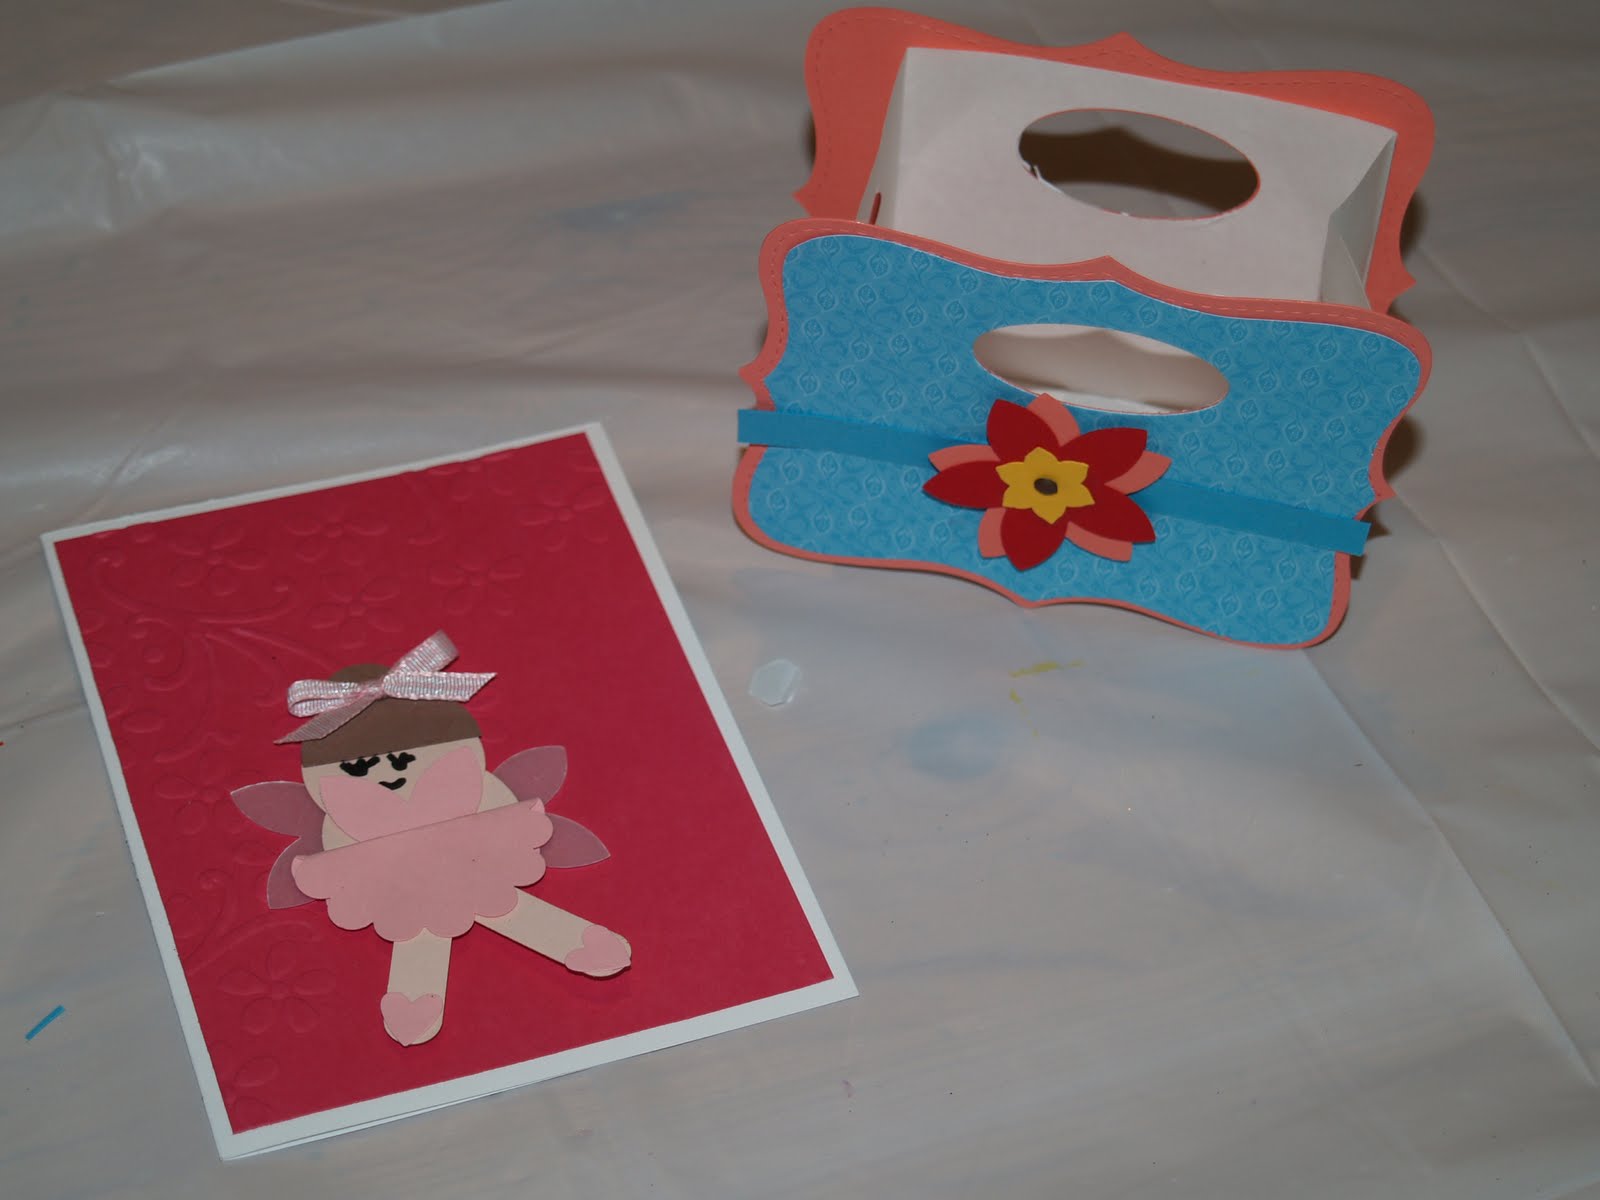
First off, we made fairy punch art using all Stampin' Up! punches. This idea was inspired by my upline, Andrea Botten, as well as a card I had seen on the Stampin' Up! demonstrator website. I was worried that six and seven year olds wouldn't be able to put these together on their own, but they did great! Before the party, I had my 4-1/2 year old try it out, just so I could make sure it was going to be easy enough.


For the second project, we made the "genie bag". This is such a fun, simple, and quick idea. The tutorial for these can be found HERE.


I also wanted to send something home with the girls, along with my business card to share with their moms. I figured I should take advantage of getting my name out there a little. I made these adorable purse post it note holders. I found an easy tutorial HERE and whipped together nine of these in less than an hour. I can't wait to try out more designs for an upcoming bazaar I'm going to be participating in.


This is what the inside looks like and the purse is held together with Velcro.


I wanted to do a little something for the birthday girl, so I put together a little gift.

I would really love to do more birthday parties in the future. I had so much fun working with the girls. I would even be willing to create the invitations, too! Maybe this is something I'll look into and advertise more.

The Birthday Girl & Friends


Each of the girls' beautiful creations...

{this particular fairy is doing the splits in the air...love it!}


Wednesday, October 13, 2010

Definitively Decorative Home Decor

Tuesday night, I had a wonderful time being able to demonstrate some of Stampin' Up!'s Decor Elements at a friend's house. It was a great group of women to inspire!

This jar was the hostess gift (thanks, Tammy!). It uses the medium size of the Chalkboard Decor Elements Oval Labels. I used a chalkboard pen that I found at Michaels and it came with three other colors. This pen definitely helped with my perfectionism!! It wipes away clean with a little Windex and a paper towel (I probably re-wrote this 5 times!).


These next two were door prizes! Again, the chalkboard decal is part of the Chalkboard Oval Labels I linked to above. It is the smallest of the three sizes. The jar with the flower uses some of the bulk buy flowers demonstrators can purchase to demonstrate how easy the vinyls are to use. We also used these flowers for the make n take.


This was the make n take for the workshop. We used the flower decals mentioned above and adhered them to the front of a hand sanitizer bottle with the front label removed. Add some ribbon for a little extra accent and you have a cute little bottle of hand sanitizer for on top of your kitchen counter for the cold and flu season.


I had many items on display for all to see. A few of them I was even able to demonstrate in front of everyone. Please feel free to leave a comment with any questions if you see something you like! Click on the link provided for each sample that will take you to the Stampin' Up! product description.

This will be the perfect decor for a little added touch for Thanksgiving. It uses the Hem Your Blessings decal (small) in Chocolate Chip. I used some retired Pumpkin Pie DSP for the background. This is an 8 x 10 frame.

Perfect for creative gift packaging, I used the Merry Trees decal (small) in Real Red and applied it to the front of a clear pail I found at Craft Warehouse.

I found this jar last year at Target after Christmas...50% off! I used the Jingle All the Way decal (small) in Real Red, tied a bow around the lid using the 1/8" red ribbon, and added some round peppermint candies.

This one might look familiar to some. I created this last year and have a tutorial on my other blog. For this particular project, I used the retired Old Olive Jingle All the Way (small). This one got the most oohs and aahs of them all!
This is a sample of how you can take a decal and add a small touch. This uses one of the flowers from the retired Ginormous Flowers. I plan to use these in my craft room, so adding this to the inside of this clock seemed perfect. I found the clock at Target for inexpensive and the front cover just pops right off!
Again, I'm using the Chalkboard Oval Labels. This one uses the large size and is perfect for my retired ribbon jar. I love that I can get three projects out of one product purchase (3 oval labels cost $5.95). I had to add a few butterflies and a bow on top to add that extra touch.
I found this idea on someone's blog (I'll search for that and come back to link to it and give credit where credit is due!) who adhered the "eat" on the front of an album. I just so happened to have a photo album that holds 4x6 photos. Since I type up my recipes on 4x6 note cards, this will be the perfect recipe book to keep my recipes in. And, I can even display it in the kitchen as "art". This project uses the EAT decal (small) in Whisper White. I added the Old Olive striped grosgrain ribbon and tied a bow.
I took a 12 x 12 frame, removed the glass, and added a metal sheet (found at Craft Warehouse). I added the smallest of the images that come with the Flourish decals (which I can't seem to find the link to on Stampin' Up!'s page).
I love this little shadow box frame. This is a picture of my two kids, cut as a square. I added Certainly Celery DSP for the background and used the "love" out of the Faith, Hope, Love, Life decals (small) in black. The shadow boxes can be found at IKEA. I believe they were $4.99 each. I also used the same shadow box for the Jingle All the Way bells frame above.
This next project uses the "hope" from the same decals as mentioned above. I found this pink polka dotted plate at Tuesday Morning a long time ago. I pulled it out when I was looking for things to use to make for this event and felt the "hope" was perfect for the pink in representation of Breast Cancer Awareness.
I just love this little project! I really wanted to use the Her Majesty decal on something and when I saw this storage container at Target, I knew what I needed to make! I put all of my daughter's princess dolls and accessories in here. The pink is PERFECT with the Rose Red crown.
The last three pictures are some of the Decor Elements that I have put up around my home. For the workshop, I had a book of samples that the ladies could look through to get inspired. I included some of these pics, as well as some friends and things I have seen around the internet.

Wild Flower Bouquet (small) in Chocolate Chip
{I really wish I would have ordered the white!}
Life Milestones (medium) in black

Happily Ever After (medium) in Chocolate Chip

This was such a fun event and I plan on trying to book a few more! I have quite a few friends who might be a little more interested in the home decor part of Stampin' Up! I might even have one at my house, so I can get the word out about the Decor Elements. There are probably 3 or 4 more projects I never got around to making, so hopefully I'll post those as soon as they are finished!

My next event? I'm doing a couple of projects for a fairy-themed birthday party for a 7-year old and her friends. It will be so much fun!!

Tuesday, October 5, 2010

Clearance Rack items just added -- how about some early Christmas shopping?


It's a Clearance Rack Blitz!!

I just had to share with you the Clearance Rack Blitz that is going on NOW through October 18th!

Stampin' Up! has just added over two hundred more discontinued items into their online Clearance Rack--some at up to 80 percent off--to help make room in the Distribution Center for new products!

PLEASE take the opportunity to head on over. Here is the link to all of the products available (or just click on the picture above): http://www.stampinup.com/ECWeb/ItemList.aspx?categoryID=493

Want to know what you might find?

  • PAPER - plain cardstock and pretty, pretty, pretty Designer Series Paper starting at just $2.49
  • RIBBON - lots and lots and lots of ribbon starting at only $2.49!! These spools are up to 15 yards! It is an incredible deal as regular price they sell for $6.95 and up!
  • BRADS - only $2.49 for 200 brads (50 brads of 4 colors)! These are HIGH quality brads!
  • INK PADS - looking to add to your ink pad collection without having to pay $5.95 each? The retired colors they have left in stock are now selling for only $2.29 each!!
  • There is also misc. embellishments, chip board, dies to use with the Big Shot die cutting machine, watercolor crayons, a few of the smaller punches, and so much more!!

Remember this is all retired stock, so once it's gone it's gone and at these prices they will sell quickly!!

How do you order, you ask? You have two options:

1) If you're local, send me your order by 1:00 PM TODAY (Tuesday, the 5th) to heidilynneboos{at}hotmail{dot}com. If you send me a $30 order by this time you will be entered into a drawing for a free Level 1 Hostess stamp set (a value up to $17.95!) You can pay check or cash when your order arrives. Please feel free to send me your order even if it's less than $30!

2) Place an online order on my website: heidiboos.stampinup.net at any time day or night by clicking on the link and then finding SHOP NOW. Then click on Clearance Rack and shop away! You can enter your credit card information (securely) right on the site. And, keep in mind...that if you end up spending $150 or more, you earn free hostess product starting at 1 FREE hostess set and $15 in free product! Get some Christmas shopping done early for that crafty friend or family member of yours or combine your order with someone else and split the hostess rewards! If you order online, it does not have to happen today, but don't wait too long before the good stuff is all gone!

Please don't hesitate to ask any questions. There are no guarantees that when I place my order at 1:30 today (TUESDAY) that all of the products are available. There are some crazy online shoppers out there! *wink*

Have a blessed day!

P.S. Please feel free to pass this information on to your friends or family and have them contact me! Thanks so much!

Friday, October 1, 2010

My First Christmas Workshop of the Season!

Almost 2 weeks ago, I did a workshop for one of my mother-in-law's friends. She specifically requested that she wanted to make Christmas cards. I was 100% on board, especially because it would give me this great opportunity to start playing with some Christmas stuff early and be thinking ahead on other events I could hold as Christmas draws near. She also wanted it to be a 3/$5 card making workshop. I have started doing these a lot more than just the one free make n take like a "true workshop" is intended to be. I usually offer that if any of the guests spend $30 or more, the cards are free!

The hostess wanted one of the three cards to be religious-themed and I had remembered that my mother-in-law had ordered the Christ is Born stamp set at my Open House in May 2009 when I first started as a demo. It was the perfect set to use and now my mother-in-law will be making these for her Christmas cards (and bought all the supplies for it!) I was also able to teach the ladies how to use the Stamp-A-Ma-Jig with this card so they could place the "Christ is Born" sentiment in the corner for there to be just enough room for the poinsettia.

Inside Greeting: Wishing you the joy and wonder of the first Christmas.
Stamp Sets: Christ is Born

Paper: Very Vanilla, Garden Green

Ink: Chocolate Chip, Garden Green, Markers: Riding Hood Red & More Mustard

Accessories: retired Alpine Originals ribbon, Top Note Die, dimensionals, gold Stickles (non-SU!)

* * * * * * * * * * * * * * * * * * * * * * * * * * * *

For the second card, I really wanted to use a new stamp set, but since I hadn't purchased many Christmas items yet, I didn't have a lot to choose from. I came up with this design after fiddling around for quite some time...seems to be the trend these days for me. Re-arranging a design more than a dozen times before I feel it's just right! Even though the snowflakes were from a retired stamp set (Best Wishes & More), it gives it the perfect touch with the white embossing.

Stamp Sets: Perfect Punches (love this set!), Best Wishes & More (retired)

Paper: Whisper White, Cherry Cobbler, Night of Navy

Ink: Cherry Cobbler, Night of Navy, Versamark (for use with embossing)

Accessories: Whisper White taffeta ribbon, Polka Dot Embossing Folder, dimensionals, white embossing powder and heat tool, scallop circle punch, 1 3/8" circle punch

* * * * * * * * * * * * * * * * * * * * * * * * * * * *

This last card I designed is probably a favorite. I love the Delightful Decorations stamp set. This was a purchase I made for myself with one of my last orders, and of course buying the punch was on that list, too! The ladies really enjoyed this card. I hadn't purchased any of the new Christmas-themed DSP yet, so I went with some retired paper that was in last year's catalog. I look forward to reproducing this card using some of the Jolly Holiday DSP and switching the Real Red for Cherry Cobbler.


Stamp Sets: Delightful Decorations, Christmas Greetings

Paper: Real Red, Very Vanilla, Old Olive, Christmas Jingle Simply Scrappin' DSP (retired)

Ink: Real Red, Old Olive

Accessories: 1/8" Real Red taffeta ribbon, dimensionals, ornament punch, eyelet border punch, Big Shot Texturz, mini glue dots, red rhinestone (non-SU!)

* * * * * * * * * * * * * * * * * * * * * * * * * * * *

I ended up preparing more card kits than what was needed (way more!), but I also decided I would make up any of the leftovers and will be using them to sell at any upcoming bazaars that I might participate in. I had 10 card kits of each card and will be selling them in groups of 5. Works for me!

Look for another post soon for the treats I made for each guest and the cute gift card holder I made for the hostess!
// ADDED BY RYAN ON 1-3-14 // END ADDED BY RYAN 1-4-14