Tuesday, September 29, 2015

September Mystery Supply Challenge

Many of the SSINK gals participated in a super fun challenge this month! We were each assigned a fellow design team member and sent that designer three products. It could be a stamped image, button, ribbon, strip of DSP, etc. Once we received those items we would need to create something with them. Today is the day that we get to share what we all made! Click on our banner below to see what everyone created!


http://ssinkspiration.blogspot.com/2015/08/mysterysupply.html

Kim Ryden from Stamping with Kim sent me these three items. I don't have the acorn stamp set, so it was fun to be able to have something new to play with!


With those three items I came up with this card...

Tuesday, September 22, 2015

Watercolor Wash

Today over at the Stylin' Stampin' INKspiration blog we are sharing card creations using single stamps! I chose to showcase the *new* Watercolor Wash background stamp. When I saw this stamp one of the things that jumped out at me was I thought it looked like water, so I ran with that for today's card I am sharing.


If you're a regular visitor to my blog, this card may look a little familiar. I created it back in July to use as a swap for Convention. I decided that it would work great for one of my cards I could use at card making night this month. This time around I changed the color of the background to Marina Mist and swapped out the sentiment to make it Happy Birthday (instead of thank you). The little turtle I kept the same and still added the pearl accents for "bubbles", as well as the Crystal Effects for the turtle's shell.


Stamp Sets
Watercolor Wash, From Land to Sea, Celebrate Today
Ink
Marina Mist, Night of Navy, Soft Suede marker, Blender Pens (with Crumb Cake and Old Olive ink)
Paper
Crumb Cake, Night of Navy, Whisper White
Accessories
SNAIL Adhesive, Stampin’ Dimensionals, Pearl Accents, Crystal Effects
 Tools
Paper Snips

Thanks for stopping by today! Make sure to head on over to SSINK to see more single stamps in action!

Friday, September 18, 2015

Butterfly Birthday (Weekly Deals)

Well, hello there! Glad to see you all here again. It's been awhile...

Woo hoo ~ card night is back!! We started up my monthly card making nights again. I always take a summer break and then roll right back into it when September comes around. Although I kind of had forgotten how much work it takes to put these card nights together. It was a busy day yesterday to pull it off...even though it came down to the wire I was able to make it happen! This year the theme is "Chocolate & Cards" and every month I plan to make a fun chocolate-y dessert for everyone to enjoy! Last night was Zucchini Brownies.

Today I am sharing one of the cards we created last night, which also showcases two of the Weekly Deals this week! (See below for more information on those deals!)

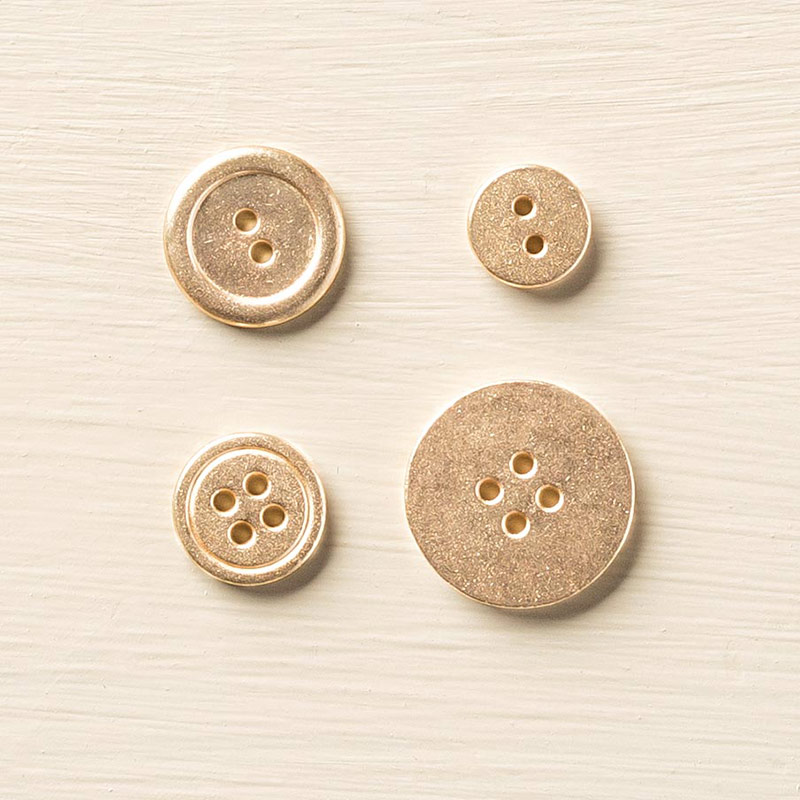
This card had a few extra steps, but with my card nights I like to create cards that are challenging, moderately easy, and then quick to put together. I was excited to add some gold accents to the card because I often will choose silver over gold. I added a button, cording and the strip of foil. I love the colors of Calypso Coral, Garden Green, and Gold paired with the softer neutral Very Vanilla. Adding large polka dots to the background just helped make the card pop a little more!


Stamp Sets
Butterfly Basics
Ink
Calypso Coral
Paper
Very Vanilla, Garden Green, Calypso Coral, Gold Foil
Accessories
SNAIL Adhesive, Stampin’ Dimensionals, Glue Dots, Gold Metal Buttons, Gold Cording
 Tools
Big Shot Die-Cutting Machine, Butterfly Framelits

Two of the elements on my card are in this week's Weekly Deals. To find out all of the Weekly Deals visit HERE. And to see what others have created using some of the Weekly Deals, head on over to the Stylin' Stampin' INKspiration blog!


Butterflies Thinlits Dies Item # 137360
Regular Price: $25.00 US Discounted Price: $18.75 US  


Gold Basic Metal Buttons Item # 133763
Regular Price: $8.00 US Discounted Price: $6.00 US 

Saturday, September 5, 2015

Paper Pumpkin "Try it Out" Night

A couple of weeks ago I held my 2nd Annual Paper Pumpkin "Try it Out" night. I offered 6 past Paper Pumpkin kits and invited my customers to come and choose 3 projects for a class fee of only $5. I also offered the incentive that if anyone signed up for Paper Pumpkin...the class would be free (also free to current subscribers).

All the choices ready to go!


An extra incentive ~ the first 8 subscribers will receive this notepad and exclusive Paper Pumpkin pen. YOU can also get your hands on one of these!! Just simply subscribe HERE using the promo code HALFOFF to get your first 2 months at 50% off...that's only $9.97! And that includes shipping!


7 sweet gals attended and had some fun choosing what they wanted to make!


Here were the six options they were able to choose from: 


And as an extra incentive for anyone who signs up for Paper Pumpkin before September 10th your name will be entered into a drawing to win one of the past Paper Pumpkin kits! The February 2015 kit will come with all of the supplies, stamp set, and ink spots! Find out all of the fun things people have done with this kit by visiting Stampin' Up!'s Paper Pumpkin Pinterest Board.

Join today by clicking the picture below!
https://mypaperpumpkin.com/en/?demoid=2049559

Saturday, August 29, 2015

Holiday Catalog Countdown - Halloween!

http://ssinkspiration.blogspot.com/2015/08/2015-holiday-catalog-countdown-day-4.html

The Stylin' Stampin' INKspiration gals are counting down the days until the new Holiday Catalog is released ~ on September 1st! Today we are sharing all things HALLOWEEN! There are so many fun things from the catalog that we want to share with you, so be sure to click the banner above to head on over to see what the other designers have created.

I chose to showcase some of the new Halloween DSP called Happy Haunting. I also used the stamp set I won at Convention called Howl-o-Ween Treat. I hand cut the witch hat with Paper Snips, but only because I don't have the coordinating Framelits...yet! Yes, those are in the catalog, too! I also showcased some of the yummy NEW Black Glimmer Paper. The cute little "BOO" is from another set in the catalog called Happy Scenes. I punched it out using the Bitty Banner Framelits.

I love the contrast of the three colors ~ Basic Black, Tangelo Twist, and Very Vanilla.


Hope you all have a wonderful weekend!

Wednesday, August 26, 2015

Mystery Supply Challenge

Most of the SSINK gals participated in a super fun challenge with each other this month. We were each assigned a fellow design team member and sent that designer three products. It could be a stamped image, button, ribbon, strip of DSP, etc. Once we received those items we would need to create something with them. Today is the day that we get to share what we all made! Click on our banner below to see what everyone created!

http://ssinkspiration.blogspot.com/2015/08/mysterysupply.html

Diana from Stampin' Fun with Diana sent me these three items. Boy, did she challenge me! She definitely went out of my comfort zone for me. ;)


And, with those items came this! I plan to give this card to my father-in-law for his birthday.

Be sure to visit all of the other designers to see what they were challenged to make!

Wednesday, August 19, 2015

Control Freaks Tour - 2015 Holiday Catalog Sneak Peek

Yippee!! Are you ready for another Control Freaks tour?! This time around we are sharing with you some of the awesome new goodies from the upcoming 2015 Holiday Catalog. This catalog is not going to disappoint you! There are so many products that meet so many different styles! As a Stampin' Up! demonstrator I was able to pre-order some of these new products and I am so excited to share with you two projects I created for the next upcoming holiday ~ Halloween!

If you have already been following along on the hop, you should have just come from the fabulous Patty Bennett's blog. If so, you're in the right spot!

First up is a Halloween card I created using the Howl-o-ween Treat stamp set. Isn't that owl adorable?! This set even comes with its own coordinating Framelits (which I don't have quite yet, so I used my handy Paper Snips to cut this little guy out). Another sneak peek is the fabulous Happy Haunting Designer Washi Tape I used this set of three washi tape to create the strips across the front of the card. And...do you see that Black Glimmer Paper behind the owl? I am in love! I am so happy to see black glimmer in this coming catalog! The "Happy Halloween" sentiment actually comes from the And Many More stamp set. I cut it out using the Bitty Banner Framelits. I thought it would be cute to have the owl look like it was holding the banner. I attached it using Dimensionals on both sides.


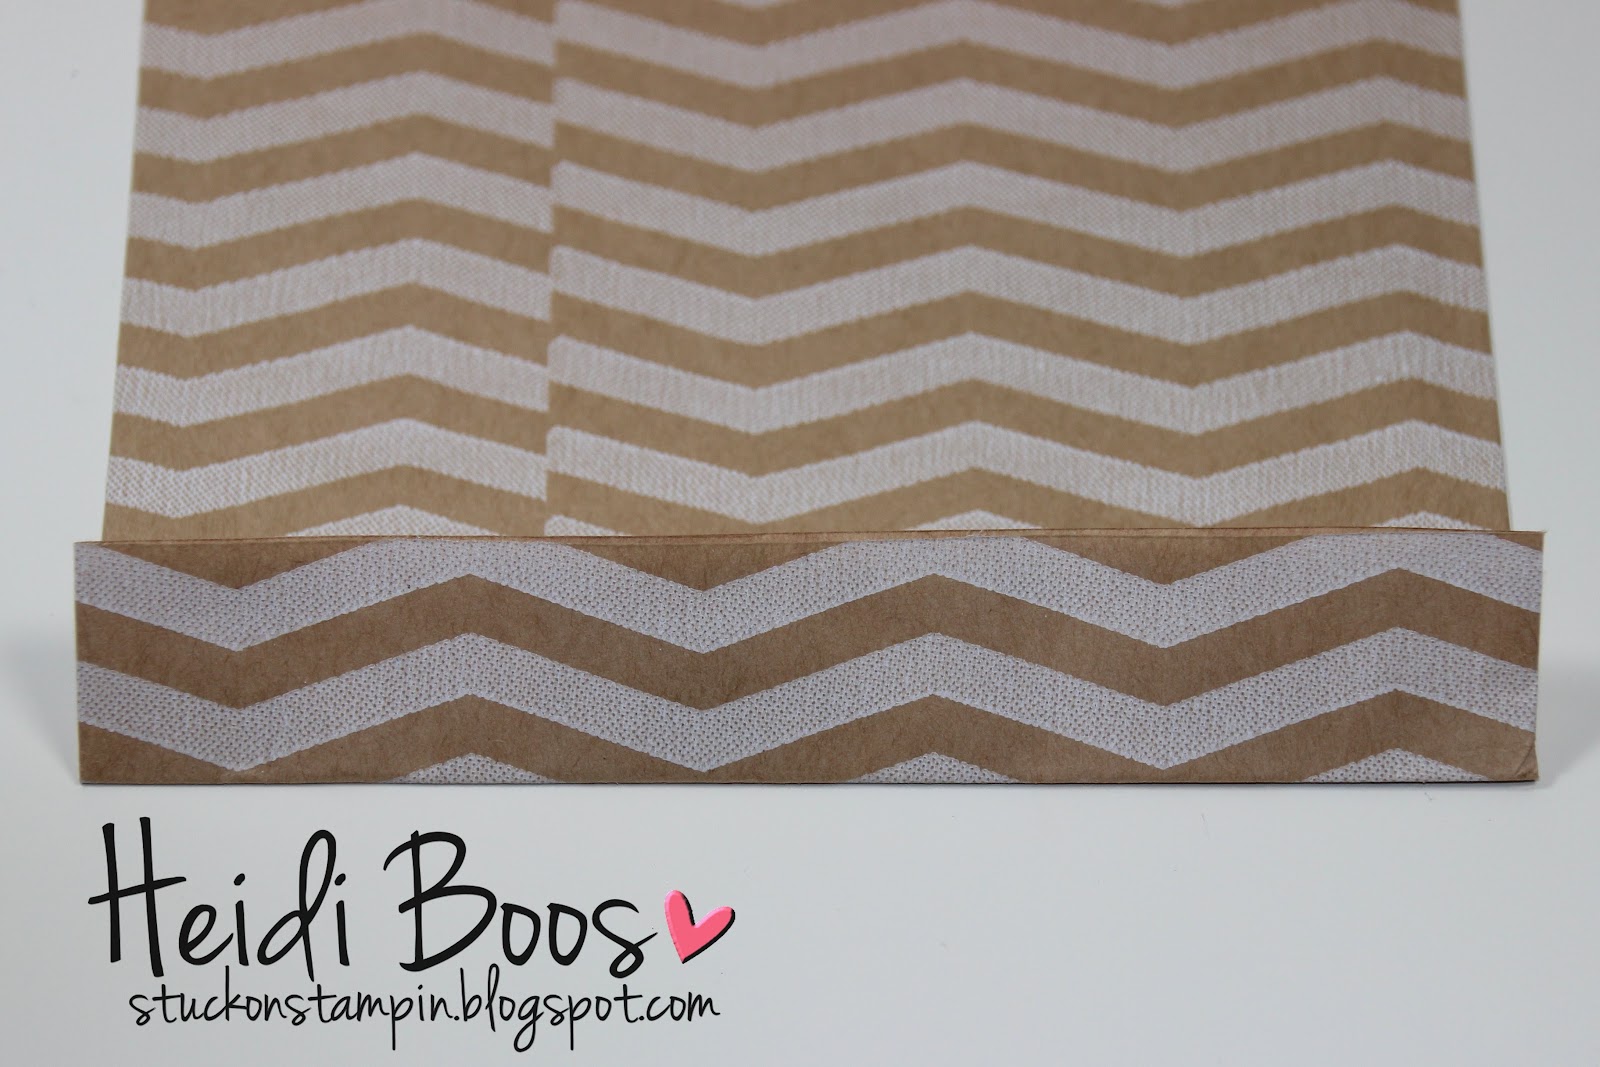
Up next ~ this is a cute little bag I created using an idea I learned about while at Convention last month. One of the main stage demonstrators showed us how to make a gusseted bag using our Tag a Bag Gift Bags. These are fun to create if you want a bag that has a little bit more space to fit some things inside. (Please note: The chevron print bags I used are no longer available. However, Stampin' Up! now carries the plain Kraft Bags that can be fully colorable, stampable, and customizable. I just didn't have any of those yet, so I improvised!)

I am not sure if you can tell, but the handle is actually made using washi tape! How cool is this?! This is another idea I learned while at Convention. To create the handle simply lay washi tape sticky to sticky. Voila! I attached the handles using a stapler and then covered it up with a strip of the new Happy Haunting Designer Series Paper. I also added a smaller strip of Black Glimmer Paper. And...the star of the show is the new fun Spider Web Doilies you see on the front of bag. The "trick or treat" image is also from the Howl-o-ween Treat stamp set. I used the Circle Framelits to cut it out and attached to the front. The little spider is also from the same stamp set. I punched it out with a 3/4" Circle Punch and attached it to a Clothespin. I also added a little bit of the Sliver Thread peeking behind the spider. This little bag reminds me of my kids' trick or treat bags.


Want to learn how to transform these bags?

On the bottom of the bag trim off 1-1/4".
(I also trimmed off the top of the bag to make the edge straight across, as well.)

Fold up from bottom about 3/4".

Fold the two sides out into a point.

And then fold both top and bottom to meet in the middle and tape closed.

This creates a larger size bottom of the bag.

http://stampercamper.com/
Such cute things to make using these Halloween goodies! Thanks so much for stopping by! I hope you felt a little bit of inspiration. Next up is the one and only Stamper Camper, Mary Brown. Keep hopping along to see what she has to share with us...as well as the rest of the Control Freak crew!

Friday, August 14, 2015

Crazy About You & Hello You Thinlits

Today's card showcases the Crazy About You stamp set (which is our stamp focus over at Stylin' Stampin' INKspiration...come visit to see what other designers have created!)

Of course I can't help but bundle this together with the Hello You Thinlits! In fact ~ did you know you can purchase these two together and save 15%! (If you want to see more great bundles we just had a blog hop yesterday showcasing some of our favorites!)


This card came together with the help of last week's sketch from Freshly Made Sketches. I wanted to do something that used bright colors, so I automatically thought of the Schoolhouse DSP. It's been awhile since I've used Pacific Point! One of the flower images in the set fit perfectly in the 1-3/4" Scallop Circle Punch. This punch is an oldie, but a goodie! It was one of the first punches I bought when I first started with Stampin' Up! six years ago. I find that I don't use it as often, so I was glad to pull it back out to help punch out those flowers in a snap! I added some Candy Dots for an extra little accent. Fun card!


Stamp Sets
Crazy About You
Ink
Daffodil Delight, Pacific Point
Paper
Daffodil Delight, Tangerine Tango, Pacific Point, Garden Green, Whisper White, Pool Party, Schoolhouse DSP
Accessories
SNAIL Adhesive, Stampin’ Dimensionals, Brights & Regals Candy Dots
 Tools
Big Shot Die-Cutting Machine, Bitty Banner Framelits, Hello You Framelits

Wednesday, August 12, 2015

SSINK Blog Hop - My Favorite Bundle

Are you ready to hop with the Stylin' Stampin' INKspiration gals? We're excited to bring you some fun inspiration using some of our favorite bundles from the 2015-2016 Annual Catalog. Did you know that Stampin' Up! offers a 15% discount if you purchase select products together? Don't miss those as you are browsing the catalog! We'll be showing you some of the bundles that we just can't live without it!

As you hop along, please be sure to comment and show some love on every blog! We are always excited to hear from our followers! You should have just left stop number 7 on the Stylin' Stampin' INKspiration Blog Hop - Kim at Stamping with Kim. If so, you are in the right spot. If a link doesn't work or you get off track, you will find the full blog hop lineup below.

I have a lot of favorite bundles, but if I had to choose just one to show you today it would be the Flower Patch Stamp Set & coordinating Flower Fair Framelits Dies. This bundle has SO MANY stamps and Framelits to play with!


This is a picture I took of the actual page in the catalog. As you look through the catalog you will see little boxes that say "Bundle and Save 15%" randomly dispersed throughout the catalog. There are quite a few different bundles of assorted products...you just have to be sure you have your eyes open wide to not miss them!


As you might notice, today's card is inspired by the sample as seen in the catalog, as well as online showcasing the bundle. I liked the placement of the three flowers and the leaves behind them, so I took that layout and ran with it. I did make it my own by adding some extra accents and using different colors. I needed a specific sentiment that wasn't in the stamp set, but all of the flowers and leaves you see on the card are in the set! This set is also perfect for two-step stamping and has many opportunities for lots of different looks!

My color scheme (Mint Macaron, Perfect Plum, Rich Razzleberry, and Pink Pirouette) came from a combination I found on Pinterest. (Quick Tip: When looking for some color combo inspiration...head to Pinterest and type in the color you like with the words "color combo" and "Stampin' Up!" You will definitely have many combinations to choose from!) I added a little bit of Blackberry Bliss and Rose Red for the inside of two of the flowers.


Aren't those pearls so pretty as accents for the middle of the flower? This up-close picture also shows you the dimension of the flowers as I used Stampin' Dimensionals to pop them up from the paper. I love adding Dimensionals as a simple way to make a card POP!


I also wanted to add a little sparkle to my card, so I used the Gorgeous Grunge stamp set to add some background and then using the 2-Way Glue Pen I added some Dazzling Diamonds Glitter. It gives it just the right kind of glimmer I was looking for without adding too much!


Stamp Sets
Flower Patch, Gorgeous Grunge, You've Got This
Ink
Rich Razzleberry, Mint Macaron, Pink Pirouette, Perfect Plum, Blackberry Bliss, Rose Red, Tip Top Taupe
Paper
Very Vanilla, Pretty Petals DSP Stack
Accessories
SNAIL Adhesive, Stampin’ Dimensionals, 2-Way Glue Pen, Dazzling Diamonds Glitter, Pearl Accents
 Tools
Big Shot Die-Cutting Machine, Flower Fair Framelits

http://stampinfunwithdiana.blogspot.com/2015/08/ssinkspiration-blog-hop-annual-catalog.htmlI hope you were inspired today with this fun bundle. I have a couple more samples of cards I have made using this same bundle. You can find those here. But first don't forget to continue on the hop to see what other bundles you can find in the catalog. There will be lots of inspiration for you no doubt! Next up is Diana at Stampin Fun with Diana. 


 Blog Hop Participant List:
  1. Diana at Stampin Fun with Diana
  2. Jennifer at Happy 2 Scrap 4 Life
  3. Cynthia at Ink-A-Doodle Creations
  4. Leanne at Literally My Joy
  5. Bree at Craft-Somnia Momma
  6. Jenny at Jenny G Paper Crafts
  7. Kim at Stamping with Kim
  8. Heidi at Stuck on Stampin'

Tuesday, August 11, 2015

Your Presents Make n Take

Tomorrow night we are having a team meeting and I an in charge of planning the make n take for the evening. Much of the information we will be talking about and discussing will be about Convention, so I thought it would be smart (and easy) to bring a make n take we created while at Convention (work smarter, not harder...right?!). However, I wanted to change it up just a wee bit...mostly because I often like to put my own extra touch on cards I CASE.

At our meeting, I am going to be demonstrating the kissing technique. I decided just to focus on using one of the presents for "kissing" (top right present). I will bring the sample of the card I created for yesterday's post to have available to look at which shows many other "kissing presents". I think this will be an easy enough card for the gals to re-create.


Here are the cards side by side. 
{Card on left from Convention make n take.}


Stamp Sets
Your Presents, Happy Birthday Everyone
Ink
Crushed Curry, Watermelon Wonder, Mint Macaron, Rich Razzleberry, Basic Black Archival Ink
Paper
Whisper White, Watermelon Wonder
Accessories
SNAIL Adhesive, Stampin’ Dimensionals, Mini Glue Dots, Rhinestones, Silver Cording, Mint Macaron 1" Dotted Lace Trim
 Tools
Paper Snips

 
// ADDED BY RYAN ON 1-3-14 // END ADDED BY RYAN 1-4-14