Pages

Friday, September 27, 2013

SS INKspiration - Friday Favorites (Halloween Treat Box)


Yippee!! It’s Friday Favorites over at Stylin’ Stampin’INKspiration and I am so excited to share with you some of my FAVORITE products right now!


I am loving the Decorative Window Gift Boxes that are in the Holiday Catalog (p. 36 / #132146, $4.95 for 6 boxes). There are so many fun things you can do with them and they are the perfect finishing touch for a special gift that can be tucked inside! (Another example of this box I decorated was the Butterfly Gift Box that holds a gift of 3x3 cards and envelopes.) I am also showcasing another favorite today...GLITTER!! Who doesn't love a little extra sparkle on your project?

Since Halloween is just around the corner and I love giving out sweet treats, I thought it would be the perfect chance to spruce up one of these boxes for Halloween creating something perfect for boxing up goodies. I filled this box with Pumpkin Spice Hershey Kisses, but I think other homemade goodies would look fun peeking through the "window" like decorated sugar cookies or yogurt covered pretzels drizzled with orange and black. The ideas are endless!

To create a Halloween Treat Box of your own, you will need:
 1 Decorative Window Gift Box
4 pieces of Witches' Brew DSP (1 3/8" x 3 7/8")
1 Basic Black square (3 7/8" x 3 7/8")
Approx. 28 inches Pumpkin Pie 1/8" Taffeta Ribbon

I used the Circle Framelits and created a hole in the middle of the square (I just eye-balled it as best I could to make it centered).

Adhere this to the top of the box. I used SNAIL adhesive for this step.

Adhere are all four pieces of DSP to each side of the box.

Now, here comes the fun part ~ GLITTER!!

To make the "glitter ring" that goes around the window, I used my Circle Framelits and a scrap piece of Pumpkin Pie cardstock to create a ring. Again, I just eye-balled it as best I could.

This is what it will look like once you have it cut out.

To add glitter, press it down onto the Versamark covering the entire ring.

Sprinkle Heat & Stick Powder all over it.

Heat set it using the Heat Tool. It will turn shiny and the white powder will disappear.

 Douse it in orange glitter and then heat set it one more time for the glitter to stick.

I used SNAIL adhesive around the edge of the window and adhered the glitter circle to the top.

 I finished it off with a simple "Trick or Treat" from the Tags 4 You stamp set. I left off the spiders on this image by coloring the stamp with Basic Black and Pumpkin Pie markers.

Complete your box by tying a bow around it. Now you have yourself a cute little box to give someone on Halloween filled with treats!


Please do not hesitate to leave a question in the comments if you need clarification on something you see here! If you would like to order any of the products above, you can visit my website at heidiboos.stampinup.net and click on SHOP NOW! 
 
I hope you'll come by to visit Stylin' Stampin' INKspiration and see what other favorites some of our designers are enjoying these days!! 

Have a great weekend! My son celebrates turning SIX on Saturday, so we'll be having lots of fun partying with friends and family over the weekend. See you on Monday!

Wednesday, September 25, 2013

CASEing myself

I have one more card to share with you that we created at last week's Card Making Night/Card Club. It was actually a card that I CASEd from myself. :) 

This is one of the cards I created for the August Stylin' Stampin' Squad Blog Hop.


The simplicity of the card was perfect for the fourth card my guests would make n take at last Thursday's event. I wanted it to be a birthday card, so I changed things up a little by using different colors and DSP. Instead of candy dots, which is what I used with the Christmas card above, I used rhinestones. Instead of making a banner poking out from the sentiment, I added a little splash of ribbon.


Stamp Sets 
Label Love (wood #130619 / $24.95, clear #130622 / $17.95)
Ink 
Bermuda Bay (#131171 / $5.95)
Paper 
Very Vanilla (#101650 / $8.50), Bermuda Bay (#131197 / $6.95), Raspberry Ripple (#126842 / $6.95), Birthday Basics DSP (#130145 / $10.95)
Accessories 
SNAIL Adhesive (#104332 / $6.95), Stampin' Dimensionals (#104430 / $3.95), Rhinestone Accents (#119246 / $4.95), Summer Starfruit Stitched Satin Ribbon (#126846 / $8.95)
Tools
Big Shot Die-Cutting Machine (#113439 / $99.95), Stylish Stripes Embossing Folder (#132174 / $7.95), Artisan Label Punch (#130920 / $15.95)
 
*to order any of the supplies you see above, visit heidiboos.stampinup.net


Thanks for stopping by!

Tuesday, September 24, 2013

taking it up a notch!


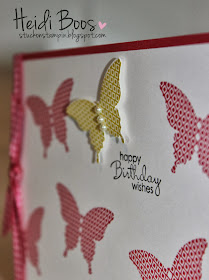
Last Wednesday I posted a little sneak peek of my Stylin' Stampin' INKspiration individual post all about butterflies! One of the cards I included in that set was this clean and simple card, which was inspired by a card created by Paula Nemethy.

For my Card Making Night/Card Club I decided to use this same card as the one above, but I wanted to take it up a notch and so I added in a few extra things.

I added a Primrose Petals cardstock base & a Primrose Petals double-stitched ribbon tied with a knot.

 With the Petite Pairs stamp set, it's easy to finish the sentiment on the inside of the card...

I also decided to pop up the Summer Starfruit butterfly by punching it out with the Elegant Butterfly bunch and I added pearls instead of rhinestones.

 And, only 1 week left to take advantage of the Papillon Potpourri bundle!
Save 15% by ordering the Bitty Butterfly Punch & Papillon Potpourri stamp set together!
Available until September 30, 2013.
Clear Mount - #135311, $26.27 (save $4.63!)
Wood Mount - #135312, $29.67 (save $5.23!)

Thanks for stopping by...see you tomorrow!

Monday, September 23, 2013

celebrate Monday!

Happy Monday Stampers!

I hope that you all had a fabulous weekend! I wanted to share with you a bright and cheery card on this blustery day here in Oregon. This card we created at my Monthly Card Making Night last Thursday. I CASEd myself and used the layout from the card I made for Framelits Friday, except rotated it a different direction. I thought this would make a perfect card for a kid's birthday! My daughter said the iguana looks like Pascal from Tangled. :)


Stamp Sets
Tag It (wood #130300 /  $22.95, clear #130303 / $16.95)
Ink
Real Red Marker (#100052 / $3.50), Pumpkin Pie Marker (#105115 / $3.50), Old Olive Marker (#100079 / $3.50), Basic Black Marker (#100082 / $3.50), Pacific Point Marker (not available individually, but you can order the full Brights Collection #131259 / $28.95)
Paper
Pacific Point (#111350 / $8.50), Whisper White (#100730 / $8.50), Polka Dot Parade DSP (#126902 / $10.95)
Accessories
SNAIL Adheisve (#104332 / $6.95), Stampin' Dimensionals (#104430 / $3.95)
Tools
Big Shot Die-Cutting Machine (#113439 / $99.95), Deco Label Framelits (#130102 / $24.95)
*to order any of the supplies you see above, visit heidiboos.stampinup.net