Pages

Tuesday, February 22, 2011

pocket silhouettes

A month or so ago, I received a new stamp set called Pocket Silhouettes and figured it was about time to ink it up! I found a couple of cards online that I really liked and decided to use these for some inspiration and start my motivation of using this stamp set by CASEing these cards.


Stamp Set:
Pocket Silhouettes, Teeny Tiny Wishes (sentiment)

Paper: Concord Crush, Daffodil Delight, Crumb Cake, Whisper White

Ink: markers ~ Concord Crush, Wild Wasabi

Accessories: Dimensionals, Rhinestone Jewel Accents

Tools: Word Window punch, Modern Label punch

* * * * * * * * * * * * * * * * * * * * * * * * * * * * * * * * *


Stamp Set: Pocket Silhouettes

Paper: Old Olive, Early Espresso, Whisper White

Ink: Old Olive, Really Rust (retired), Early Espresso

Accessories: Dimensionals, Old Olive brads

Tools: Modern Label punch

* * * * * * * * * * * * * * * * * * * * * * * * * * * * * * * * *

This one is an HB Original {*wink*}
I wanted something Clean & Simple...so this is what I came up with.

Stamp Set: Pocket Silhouettes, Teeny Tiny Wishes (sentiment)

Paper: Whisper White

Ink: markers - Old Olive, Rose Red, So Saffron, Pink Pirouette

Accessories: Dimensionals, Pearls Jewel Accents

Tools: flower from the Punch Pack

* * * * * * * * * * * * * * * * * * * * * * * * * * * * * * * * *

Do you own the Pocket Silhouettes stamp set? I would LOVE to see what you have made using it...leave me a comment with a link to your site!

Monday, February 14, 2011

wrapping up Valentine's Day

What a great Valentine's Day! It was a low-key kind of day, but definitely filled with lots of LOVE for my family and friends!

To wrap up Valentine's Day, I thought I would share a few more projects before I move onto all things SPRING!

This little 3x3 card was made for my two kiddos. They each have a little mailbox that I put a little treat or card in every day the week leading up to Valentine's Day. {More details on my family blog.}


Stamp Set: Pun Fun, Short & Sweet

Paper: Whisper White, Real Red DSP, Red Glimmer Paper

Ink: Early Espresso, Real Red

Accessories: Dimensionals

* * * * * * * * * * * * * * * * * * * * * * * * * * * *

My daughter is in pre-school and today was their class Valentine's Day party. I wanted to get her teachers something a little different than just candy. I found the cutest little heart-shaped turners and Valentine's kitchen towels.

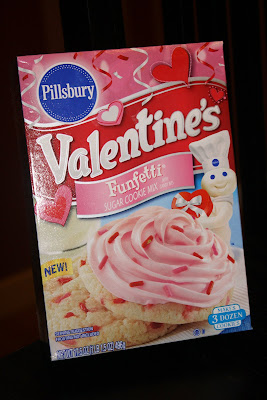
And I added a box of Funfetti Sugar Cookie Mix...

To make a cute little package for her teachers...


{up close of the tag}

Stamp Set: none

Paper: Whisper White, Real Red, Pretty in Pink, Sending Love DSP (retired), Red Glimmer Paper

Ink: none

Accessories: Dimensionals, red gemstone (non SU!)

Tools: Full Heart punch, Scalloped Heart of Hearts Embosslit, Itty Bitty Shapes Punch Pack

* * * * * * * * * * * * * * * * * * * * * * * * * * * *

Lastly, I am part of a mom's group called MOPS (Mothers of Preschoolers) and I am a group leader to 4 moms. We meet each month and I enjoy bringing a little treat to place at their table setting. I found this cute little treat idea here and just knew that this would be the treat for this month!


Stamp Set: Filled With Love (no longer available), Teeny Tiny Wishes

Paper: Whisper White, Real Red, Real Red DSP

Ink: Real Red

Accessories: Dimensionals, red gemstone (non SU!), 1/8" Real Red Taffeta ribbon

Tools: Full Heart punch, Scalloped Heart of Hearts Embosslit, Modern Label punch


Hope everyone had a wonderfully blessed Valentine's Day!

Tuesday, February 8, 2011

quick and simple valentines

On Sunday, during the Superbowl (I'm a multi-tasker!), I made 20 of these cute, but simple classroom valentines. These are blank on the back where the child can add a "to" and "from", as well as attach a piece of candy if they wish!


**Measurements**
Pretty in Pink - 3 1/4" x 3 1/4"
Whisper White - 3" x 3"
Real Red Polka Dots - 2 3/4" x 2 3/4"

Stamp Set: Teeny Tiny Wishes

Paper: Whisper White, Pretty in Pink, Love Patterns DSP, Red Glimmer Paper (love!)

Ink: Real Red

Accessories: Dimensionals

Tools: Scalloped Heart of Hearts Embosslits Die, Full Heart punch, Modern Label punch

Saturday, February 5, 2011

Stamp Club - February

Wow! Time flies...I feel like I was just posting about stamp club not too long ago. We had to postpone last month's stamp club by a week, so there was only a 3 week break in between instead of our usual 4 weeks, so that's probably why it felt like "just yesterday".

I like to go with some sort of theme each month and often times will see what the hostess may want me to share with the group. My friend, Kim, who was the hostess this month let me decide what to do. I knew she owned a Big Shot (Christmas present a couple of years ago!), so I thought I would share some of the fun things that a Big Shot can create!

For the first project, we made a dress using the Scallop Circle Bigz Die. To make the shape of the dress, I counted 4 scallops at the top and 10 scallops at the bottom and then cut it in the shape that I wanted. I made a couple of patterns out of cardboard to have for others to use.


I wasn't satisfied with putting the sentiment on the front of the card (I couldn't figure out where to put it), so I placed it on the inside instead, punched out with the Decorative Label punch and popped up using Dimensionals.

Stamp Set: Apple Blossoms (Level 2 Hostess set)

Paper: Whisper White, Rich Razzleberry, Cottage Wall DSP (retired)

Ink: markers ~ Rich Razzleberry, Old Olive

Accessories: Dimensionals, Whisper White 3/8" Taffeta ribbon, Chocolate Chip flower brads (retired)

Tools: Big Shot, Scallop Circle Bigz Die, Backgrounds 1 Texturz Plates

* * * * * * * * * * * * * * * * * * * * * * * * * * * * * *

For the second project, I went with polka dots! We used the Perfect Polka Dots Impressions Folder (my favorite!) and the Beautiful Wings Embosslits die to create the butterflies. I love how simplistic this card came out and I was inspired by a card I had seen on Stampin' Connection (a Stampin' Up! demonstrators only website). The great thing about this card is that I used my Color Coach to find the color combination...it reminds me so much of a sweet little baby that I used a "Welcome, Baby" sentiment.


Stamp Set: Something to Celebrate (Level 2 Hostess set from 2011 Occasions Mini Catalog)

Paper: Whisper White, Crumb Cake, Chocolate Chip, Pretty in Pink, Wild Wasabi

Ink: Chocolate Chip

Accessories: Dimensionals

Tools: Big Shot, Perfect Polka Dots Textured Impressions Folder, Beautiful Wings Embosslits Die

* * * * * * * * * * * * * * * * * * * * * * * * * * * * * *

The last project (my favorite!) uses the Pillow Box Bigz Die. I just got this die last week and I don't know why I waited so long...I love it! I used a pretty simple design to try it out, but I'm loving the colors. And, as you can see...I had to find candy that matched to put inside! These are the tropical fruit Mike N Ikes...I picked out the turquoise and orange, of course! ;)


Stamp Set: Perfect Punches (clear mount, wood mount)

Paper: Whisper White, Brights Patterns Paper Stack (Tempting Turquoise), Pumpkin Pie (flower)

Ink: Pumpkin Pie

Accessories: Dimensionals, 1/2" Pumpkin Pie striped grosgrain ribbon (retired), Rhinestone Jewel Accents

Tools: Big Shot, Pillow Box Bigz Die

* * * * * * * * * * * * * * * * * * * * * * * * * * * * * *

With the theme being the Big Shot, I thought it would be appropriate to make a hostess gift using the Big Shot. Isn't this the cutest little purse? I filled it with Butterfinger hearts (I knew Kim's favorite candy was Butterfinger). The tutorial for this purse is from the talented Becky Roberts at Inking Idaho. I didn't have the grommets for the top of the purse where the ribbon handle goes, but I did my best to improvise...although I do wish I would have put the holes further apart.


Stamp Set: none

Paper: Pretty in Pink, Sending Love Specialty paper (but it can stil be found in the Clearance Rack)

Ink: none

Accessories: 1/2" Pretty in Pink Satin Ribbon, Pretty in Pink heart brad (retired), glue dots (to adhere flowers), Velcro (to hold purse lid closed), Sticky Strip

Tools: Big Shot, Scallop Circle Bigz Die, Top Note Bigz Die (exclusive to Stampin' Up!), 5 Petal Flower punch, Paper Piercing Tool & Mat Pack

* * * * * * * * * * * * * * * * * * * * * * * * * * * * * *

Interested in being a part of my monthly stamp club? We will finish off the current one in May and I hope to start a new one once the new catalog debuts this summer in July. The club will most likely start up in October like I did with this last one. Ask me for more information!

Thursday, February 3, 2011

Valentine's Treats - just for fun!

Last week, I had a little bit of extra free time (what?! that's unheard of!) Well, maybe it was free time that I should have used to do other things, but I really had the itch to make some Valentine's Day treats. And to make it even sweeter, I had some leftover candy from another project I had done, so I put together a few little treat bags. I decided that I would send some to "Pitter Patter", a local children's consignment shop that I have a few of my cards displayed at. Plus, I wanted to have some on hand if I needed a quick treat for a friend or a customer during the month of February.

Stamp Set: Love You Much

Paper: Whisper White, Real Red, Pretty in Pink, Real Red DSP

Ink: Real Red

Accessories: Dimensionals

Tools: 1 3/4" Scallop Circle punch, 1 1/4" Circle punch, 1 3/8" Circle punch, Top Note Die (used with the Big Shot die cutting machine)

* * * * * * * * * * * * * * * * * * * * * * * * * * *

At the beginning of this week, I was asked to make some valentines that I might want to display at "Pitter Patter" for anyone interested. I have advertised before that I am happy to do custom orders, and with Valentine's Day just around the corner, I figured advertising for anyone who might want to order valentines for their child's classroom might be a good idea to get my name out there a little.

These butterfly treats were made using the Beautiful Butterflies Bigz Die (used with the Big Shot die cutting machine). I die cut the butterflies and then used the Perfect Polka Dot Textured Impressions Folder. I added a candy heart to the front by attaching with Sticky Strip so it would stay on there tight enough with all the handling valentines get. It said "Palmer's" on the front of the candy, so to cover it up, I punched out a heart using the Small Heart punch with the new Red Glimmer Paper in the Occasions Mini Catalog (love that paper and it's so perfect for Valentine's Day!)


On the back, I stamped "Be My Valentine" on Whisper White and punched it out using the 1" Circle punch. There is room on the wings if you wanted to write "to" and "from".

Stamp Set: Filled With Love (no longer available)

Paper: Whisper White, Real Red, Pretty in Pink, Red Glimmer Paper

Ink: Real Red

Accessories: Sticky Strip (to attach candy to butterfly)

Tools: 1" Circle punch, Beautiful Butterflies Bigz Die, Perfect Polka Dots Textured Impressions Folder, Small Heart punch

* * * * * * * * * * * * * * * * * * * * * * * * * * *

I also made a few random cards since I've had all my red and pink paper out and Valentine's Day stamp sets. The first one I made using the now unavailable (sad!) Filled With Love stamp set.


Stamp Set:
Filled With Love (no longer available)

Paper: Whisper White, Real Red, Pretty in Pink, Real Red DSP Red Glimmer Paper

Ink: Real Red

Accessories: Dimensionals, Pretty in Pink 3/8" Taffeta ribbon

Tools: Scallop Edge Border punch, 1 1/4" Circle punch and 1" Circle punch (to make the "O" in LOVE)

* * * * * * * * * * * * * * * * * * * * * * * * * * *

I used this same card design for a workshop I held recently, but thought I might add a birthday greeting instead of Valentine's Day just to change it up a little! The front flap is tucked underneath the heart.


Stamp Set:
Filled With Love (no longer available), On Your Birthday

Paper: Whisper White, Chocolate Chip, Pretty in Pink DSP,

Ink: Real Red

Accessories: Dimensionals, Chocolate Chip 5/8" Satin ribbon (retired), Jewel Rhinestone Accents

Tools: Full Heart punch, Small Heart punch