Wednesday, March 30, 2011

pun fun...without the pun

A couple of days ago I found a new blog called Fun to Stamp with Sherri. Sherri has some beautiful card creations, but best of all...her pictures to capture those cards are gorgeous! With one look at one of her cards, I was hooked on her blog and will definitely look forward to more! This week Sherri is challenging her readers to dust off their Pun Fun stamp set and do a little watercoloring, which definitely isn't my strong point (which you will see in the samples below). But you can't get better at something unless you practice at it!

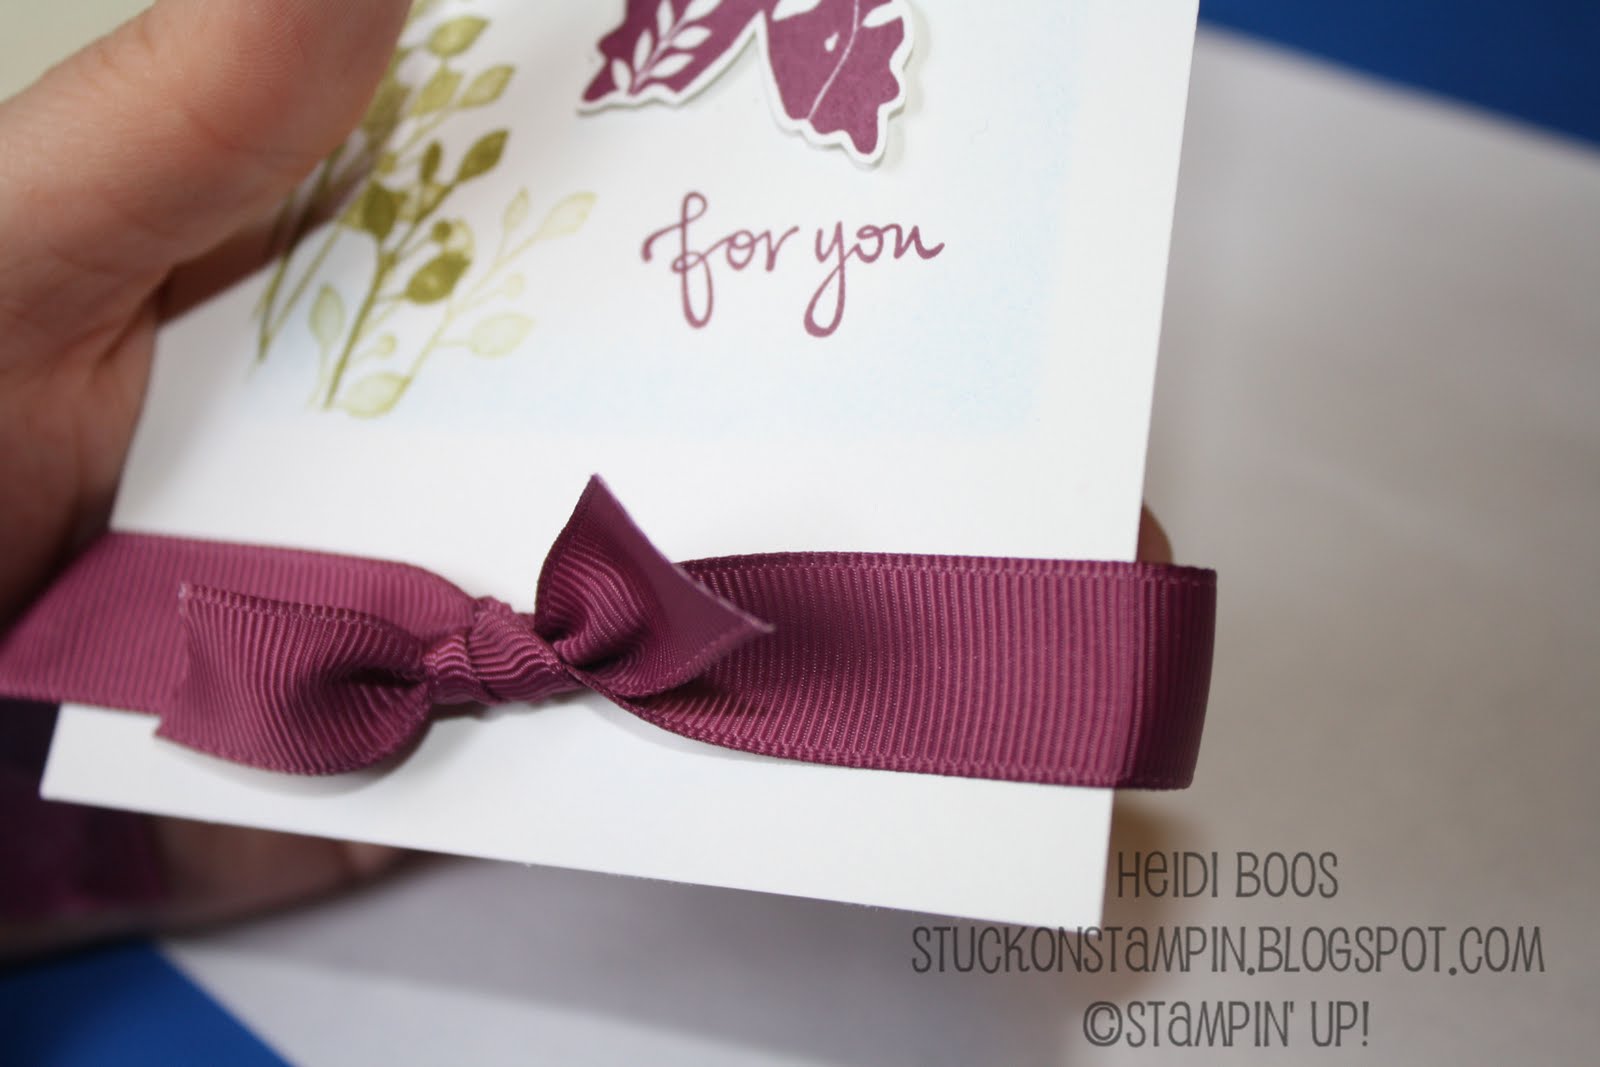
Normally there is a "pun" to go with each image, but I chose to use a different sentiment for each of the cards to give it the look I was going for. If you've been following my blog, you know that I love a clean and simple card, so that is what you will see in the following three cards.


Stamp Set: Pun Fun, On Your Birthday

Paper: Riding Hood Red, So Saffron, Whisper White, Varsity Blues (retired)

Ink: markers with blender pen (Riding Hood Red, Bashful Blue, Old Olive, So Saffron), Bashful Blue (sponging around the edges)

Accessories: Dimensionals

Tools: mat pack & piercing tool

* * * * * * * * * * * * * * * * * * * * * * * *


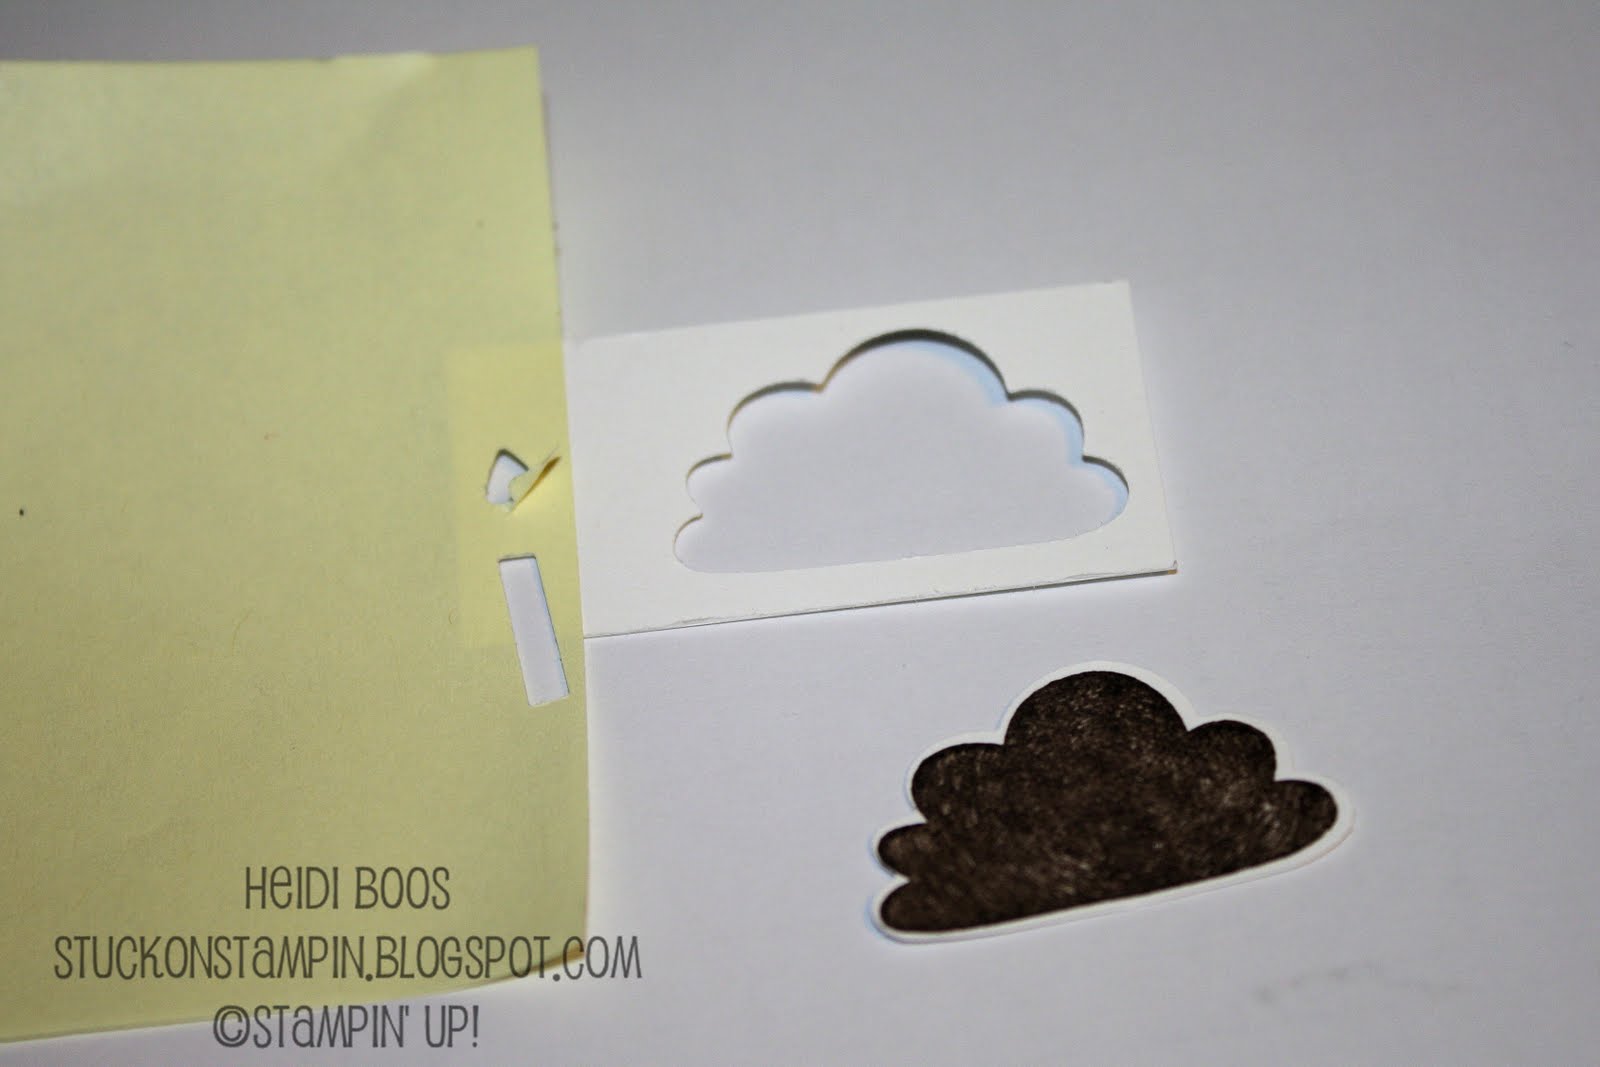
With this particular card, I decided to just outline the image with a blender pen and Basic Gray to give it a softer look.
Stamp Set: Pun Fun, A Little Birthday Cheer (retired)

Paper: Whisper White, Poppy Parade, Pear Pizazz, Tempting Turquoise, Pawsitively Prints II

Ink: markers with blender pen (Poppy Parade, Basic Gray, Tempting Turquoise), markers - Tempting Turquoise, Poppy Parade for sentiment

Accessories: Dimensionals, 1/4" Tempting Turquoise grosgrain ribbon (retired)

Tools: mat pack & piercing tool, 2 3/8" Scallop Circle punch

* * * * * * * * * * * * * * * * * * * * * * * *


As the card above, I decided to just outline the image below with a blender pen and Basic Gray to give it a softer look.
Stamp Set: Pun Fun, A Little Birthday Cheer (retired)

Paper: Whisper White, Poppy Parade, Pawsitively Prints II

Ink: markers with blender pen (Poppy Parade, Basic Gray), Basic Black (sentiment)

Accessories: Dimensionals, brads

Tools: Scallop Rectangle Clearlits Die


Thanks for stopping by my blog!

{Check out other Pun Fun
creations at Fun to Stamp.}

Tuesday, March 29, 2011

Tuesday Tip - storing your embellishments

Welcome to this week's "Tuesday Tip"! I've been doing these weekly "Tuesday Tip" posts for one month now and I hope you have enjoyed reading...I have really enjoyed sharing! (Check out the last three week's "Tuesday Tips" HERE)

I'm pretty conservative (in comparison) when it comes to purchasing embellishments for my card or scrapbooking projects, and I often will take my supplies "on the go" to different places to either scrapbook or make cards. Because of this, it was always a little more difficult to take with me the small round containers that Stampin' Up! embellishments come in. I wanted to grab them ALL because I didn't want to be without something, but they weren't the easiest to keep organized when I was packing up everything (there were too many!) or when I was out working on projects trying to find the right embellishment.

I don't own the Stack & Store Caddy (on the left), which is perfect for these little round containers, and would be perfect for my craft room at home, but...with me being on the go so much, I needed something a little different that would work better for me.

So, to help with my dilemma, I purchased some bead storage container boxes and began organizing!

{SU! exclusive brads}

{SU! exclusive buttons}

{SU! exclusive misc. embellishments & brads}
These boxes stack and store neatly on my shelf in my craft room. When I need them, I just grab and go! As you can see, I also have "non-Stampin' Up!" (gasp!) embellishments that I often will use in my scrapbooking.
There are many embellishments out of the Stampin' Up! catalog that I haven't purchased yet (I've only been a demo for 2 years, so I have many more years to collect!). I try to keep with simple choices as to not overall myself (well, that and I wouldn't be able to afford it!). However, I'd be lying if there weren't days that I wish I had "that one embellishment" I saw on "that one project". If my embellishment collection begins to grow, it just means my non-SU! collection will have to find a new home! I have lots of room to expand with these storage boxes.

Now, what to do with all of these empty round containers...


Turn them into treat holders, of course!


Disclaimer: Many of the "Tuesday Tips" I share each week have been gathered through my experience as a Stampin' Up! demonstrator and crafter. I do not necessarily claim any of them as my original idea (unless it really is!), but rather things that I have seen here and there through blogging, surfing the web, attending events, and such. If there is a specific idea I have seen and want to share, I will be sure to give credit where credit is due.

Monday, March 28, 2011

Stamp Club - April {in March}

Last Friday was my monthly stamp club...and what a fun time it was!! We had to move our April club date to the end of March because I will be gone during our First Friday meeting in April. Plus, it was the perfect time to sneak in one more Sale-A-Bration order! I love my stamp club gals and will definitely miss our monthly get togethers after our last club meeting in May.

My mother-in-law was this month's hostess (I also held a workshop for her on Wednesday) and she suggested that she wanted to make cute little projects she could use for party favors or give as little gifts to friends.

{Hostess Gift}
a tutorial can be found HERE

Stamp Set: Great Friend

Paper: Melon Mambo, Pretty in Pink, Whisper White, Ice Cream Parlor DSP (SAB exclusive)

Ink: Melon Mambo

Accessories: Dimensionals, hemp twine, Rhinestones Jewel Accents, 5/8" Pretty in Pink satin ribbon, sticky strip

Tools: Oval punch, Scallop Oval punch, Scallop Envelope Bigz Die, punch pack

* * * * * * * * * * * * * * * * * * * * * * * * * * * *

PROJECT #1
{Scallop Envelope Box}
a tutorial can be found HERE

Stamp Set:
Great Friend

Paper: So Saffron, Poppy Parade, Whisper White, Pawsitively Prints II DSP

Ink: markers - Tempting Turquoise, Poppy Parade

Accessories: Dimensionals, Rhinestones Jewel Accents, 1/2" Poppy Parade Poly-Stitched ribbon, sticky strip

Tools: Beautiful Wings Embosslits Die, Scallop Rectangle Clearlits Die, Small Oval punch

* * * * * * * * * * * * * * * * * * * * * * * * * * * *

PROJECT #2

{Mini Pizza Box}
a tutorial can be found HERE


Stamp Set: Great Friend (for you), Bold Blossom (clear mount)

Paper: Whisper White, Pretty in Pink, Night of Navy, Old Olive

Ink: Old Olive, Pretty in Pink, Night of Navy

Accessories: Dimensionals, sticky strip, mini glue dots, pink gingham ribbon (retired), Rhinestones Jewel Accents

Tools: 3/4" Circle punch, Scallop Square Duo Bigz Die, Perfect Polka Dots Textured Impressions Embossing Folder

Friday, March 25, 2011

crazy for {clean & simple} cupcakes!

I played with the Create a Cupcake stamp set (in clear mount) and Build a Cupcake punch the other day and had so much fun creating a few cards to put into my card stash and also to have some all designed and ready to go if I needed a last minute workshop or "card night" card.


Stamp Set: Create a Cupcake

Paper: Real Red, Bashful Blue, Pacific Point, Whisper White, Certainly Celery DSP (stripes)

Ink: Real Red, Bashful Blue, Certainly Celery

Accessories: Dimensionals, 5/8" Real Red satin ribbon

Tools: Build a Cupcake punch

* * * * * * * * * * * * * * * * * * * * * * * * * * * *


{up close to show you the background polka dot texture}

Stamp Set: Create a Cupcake

Paper: Chocolate Chip, Wild Wasabi, Pretty in Pink, Whisper White

Ink: Wild Wasabi, Pretty in Pink, Melon Mambo, Chocolate Chip

Accessories: Dimensionals, 1/4" Chocolate Chip grosgrain ribbon

Tools: Build a Cupcake punch, Backgrounds 1 Texturz Plate (polka dot background) used with Big Shot

* * * * * * * * * * * * * * * * * * * * * * * * * * * *


{I added a jewel accent on top of the flower brad to add a little extra bling!}
Stamp Set: Create a Cupcake, Dot, Dot, Dot (single stamp)

Paper: Whisper White, Crumb Cake, Melon Mambo, Melon Mambo DSP (polka dots)

Ink: Melon Mambo, Crumb Cake

Accessories: Dimensionals, pink flower brad, rhinestone jewel, 5/8" Pretty in Pink satin ribbon

Tools: Build a Cupcake punch

* * * * * * * * * * * * * * * * * * * * * * * * * * * *


Stamp Set: Create a Cupcake, Punch Bunch (SAB exclusive set)

Paper: Whisper White, Poppy Parade, Peach Parfait, Sunny Garden DSP

Ink: Poppy Parade

Accessories: Dimensionals, 1/2" Poppy Parade poly-stitched ribbon

Tools: Build a Cupcake punch

* * * * * * * * * * * * * * * * * * * * * * * * * * * *

{I made this card for a friend whose birthday is on St. Patty's Day!}
~ card measures 4.25" x 4.25" ~

Stamp Set: Create a Cupcake, So Happy For You (shamrock - SAB exclusive)

Paper: Wild Wasabi, Whisper White, So Saffron, Melon Mambo, Ice Cream Parlor DSP (SAB exclusive)

Ink: Melon Mambo, So Saffron, Early Espresso, Wild Wasabi

Accessories: Dimensionals, Basic Pearls Jewel Accents

Tools: Build a Cupcake punch, Modern Label punch, Decorative Label punch, Scallop Trim Border punch

* * * * * * * * * * * * * * * * * * * * * * * * * * * *

Interested in purchasing the Create a Cupcake stamp set and Build a Cupcake punch? Add them to an order totaling $50 anytime now until March 31st, and you can get a free gift through the Sale-A-Bration promotion! Visit HERE to shop now!!

Thursday, March 24, 2011

Wednesday workshop

Yesterday I had the pleasure of holding a 3 for $6 stamping get together at my mother-in-law's home for her and her friends. She lives about an hour away, so it's not often that her friends are able to join me for my card making nights or events that I hold at my own home. My mother-in-law holds a weekly Bible study with a group of ladies, so we planned to do some stamping during the day on a regularly scheduled Bible study day. There were a great group of 10 ladies who came to stamp together. Because there are a handful of ladies who live "that way" who are interested in getting together on a regular basis for card nights, I'll be starting a stamp night every other month to be held at my mother-in-law's home. Should be a fun time!

The first card we made was an Easter card...

{I love those pearls!}

Stamp Set: Easter Blossoms (clear mount)

Paper: Pink Pirouette, Certainly Celery, Whisper White, Soft Suede, Pawsitively Prints (pastel version, retired)

Ink: Soft Suede, Crumb Cake

Accessories: Dimensionals, Pink Gingham ribbon (retired), Basic Pearls Jewel Accents

Tools: Scallop Edge Border punch

* * * * * * * * * * * * * * * * * * * * * * * * * * * *

The next card you may have seen HERE before from a workshop I did about a year and a half ago. My mother-in-law really liked it and thought it would be a good one for her friends. On Tuesday, I shared how to make a faux knot in my Tuesday Tip using this card - check it out HERE!

{the butterfly is cut out and "popped up" with a Dimensional}

Stamp Set: Great Friend

Paper: Rich Razzleberry, Old Olive, Whisper White

Ink: Rich Razzleberry, Old Olive, Bashful Blue

Accessories: 5/8" Rich Razzleberry Grosgrain ribbon, Dimensionals

Tools: Eyelet Border punch, Paper Snips (used to cut out the butterfly)

* * * * * * * * * * * * * * * * * * * * * * * * * * * *

For the third project, my mother-in-law wanted to make a little treat holder. We made these at our stamp club a couple of months ago. The ladies yesterday had their choice between using Pacific Point or Rose Red. Inside we put Jelly Belly candies.

Stamp Set:
Perfect Punches (clear mount)

Paper: Pacific Point & Rose Red DSP (polka dots), So Saffron, Pumpkin Pie

Ink: Pumpkin Pie, Rose Red

Accessories: 1/2" So Saffron Striped Grosgrain ribbon (retired), 1/2" Pumpkin Pie Striped Grosgrain ribbon (retired), Basic Rhinestones Jewel Accents

Tools: Wide Oval punch, Punch Pack (flower)

* * * * * * * * * * * * * * * * * * * * * * * * * * * *

Don't forget there are only 7 days left until Sale-A-Bration ends! Spend $50 in catalog product and get a free gift! For more information, visit my website HERE.

Tuesday, March 22, 2011

Tuesday Tip - faux knot

I'm posting today's "Tuesday Tip" just a little bit later (or a lot later) than I had hoped (busy day!)...I have a little over 2 hours to spare until the clock hits midnight and it's Wednesday, so I'll make it quick.

This week's tip is to share how to create a "faux knot". This helps a little with saving on the amount of ribbon you need to use, as well as helping you tie a knot without all of the fumbling fingers.

My faux knot

Start with two lengths of ribbon, measuring the longer piece long enough to wrap around the piece of paper you are attaching the ribbon to.


Taking the smaller piece, form the two pieces of ribbon into a "T'.


Tie a knot. (excuse the need for a manicure!)


Place adhesive on the back of the ribbon.


Then wrap around your cardstock you would like to attach it to.


View from the back.


I took the Old Olive cardstock and adhered it to the Whisper White to cover up the ribbon pieces on the back.


Completed card...


*Note: This "faux knot" works best when you will be covering the back of the pieces up.

More Tuesday Tips:
Storing your clear mount stamps inside their cases
Punching out small scraps of paper easily

Thursday, March 17, 2011

St. Patty's Day treat!

I put together a little GREEN treat for my mom's group to let them know how LUCKY I am to have each of them be a part of my life!


Stamp Sets: Afterthoughts (Hostess Level 2)
& So Happy For You (Sale-A-Bration)

Ink: Wild Wasabi
Punch: Decorative Label

* * * * * * * * * * * * * * * * * * * * * * * * *

Are you wearing GREEN today?
Happy St. Patty's Day!

Wednesday, March 16, 2011

3/$6 Card Making Night - March (let's make cupcakes!)

This past Monday night, I held a card making event at my home. I try to offer a monthly card night where stampers are invited to come make 3 cards for only $6. I design each of the three cards and prepare the supplies in advance, so all the stampers have to do is come and stamp away...leaving with three cards to give to someone special! It is a popular night for those who really love to stamp and be crafty, but don't have the space to get out all of their card making supplies or the finances to purchase their own supplies. They can come use my "toys" and if they find something they would love to own, they can put it on their wish list for the future!

This month's theme was cupcake birthday cards using the Create a Cupcake stamp set and Build a Cupcake punch. These are both out of the Occasions Mini Catalog which runs through the end of April. It took me awhile to finally decide to purchase these two products (not sure why), but now I'm so happy that I have them! they are awesome! (Word of advice...I opted for the clear mount for the cupcake set, but because of all the little pieces, I may have been better off with the wood mount, especially because most everything you will punch out anyway.)


Stamp Set: Create a Cupcake

Paper: Real Red, Early Espresso, Pumpkin Pie, Whisper White, Summer Picnic DSP (retired), Pawsitively Prints DSP

Ink: Early Espresso, Real Red, Pumpkin Pie

Accessories: Dimensionals

Tools: Build a Cupcake punch, Two Step Owl punch (used for the tiny heart), Bigz Scallop Square Duo Die used with the Big Shot, paper piercing tool and mat pack (to make the holes around the white square)

* * * * * * * * * * * * * * * * * * * * * * * * * * *


Stamp Set: Create a Cupcake

Paper: Bashful Blue, Chocolate Chip, Whisper White, Certainly Celery, Certainly Celery DSP (the striped cupcake "liner")

Ink: Chocolate Chip, markers - Rose Red, Certainly Celery (to create the cherry on top)

Accessories: Dimensionals, 1/4" Chocolate Chip grosgrain ribbon (retired),

Tools: Build a Cupcake punch, Dotted Scallop Ribbon Border punch

* * * * * * * * * * * * * * * * * * * * * * * * * * *


Stamp Set: Create a Cupcake

Paper: Melon Mambo, Crumb Cake, Chocolate Chip, Whisper White

Ink: Chocolate Chip, Pretty in Pink, Chocolate Chip, markers - Melon Mambo, Wild Wasabi (used to color flower)

Accessories: Dimensionals, 3/8" Pretty in Pink taffeta ribbon, Basic Pearls Jewel Accents, pink glitter (non-SU!) used with 2-way glue pen

Tools: Build a Cupcake punch

For this particular card above, I decided to stamp and punch each of the cupcake pieces, so that all the stampers had to do was assemble the cupcakes and add the tiny details. I heard many of the gals say they wanted to give this particular card to someone who would appreciate all of the work and detail it took to create! With only having one punch and one stamp set to share amongst 10 stampers, I had to do some creative thinking and I figure my guests would appreciate me doing a little more of the "grunt work"...and they did appreciate it! (Just picture me on Saturday afternoon stamping and punching out enough pieces to make 20 card kits!)

* * * * * * * * * * * * * * * * * * * * * * * * * * *

And the event wouldn't be complete, without some cupcakes for a treat! Nothing gourmet or too fancy, but just a little something to add to the fun!

I felt like the evening was a success and there were many ladies who couldn't come, but who decided to purchase the card kits and then would assemble the cards at home. This is an option I began offering a few months ago and it's nice for those who can't always make it, but still would like to put together a couple of cards. I will stamp/punch anything necessary and leave the assembly to the person buying the kit. It works great! I even made a couple of sets of cards for those who didn't necessarily want to put them together, but still wanted to buy the cards we were making!

Want to see more of the kinds of cards we create at my monthly card nights? Check them all out HERE.

Tuesday, March 15, 2011

Tuesday Tip - punch it out!

If you're a regular follower of my blog, you will know that last week I declared Tuesdays as "Tuesday Tip" day. I want to be able to share a useful tip each week (or as often as I realistically can) for using your Stampin' Up! products. Today's tip involves using punches, which are definitely one of my most favorite Stampin' Up! products.

Have you ever stamped an image on a scrap of paper....


Only to find out that the scrap wasn't big enough for you to put inside the punch...


Now, you can probably maneuver it with your thumb to get it just right, but that's not always accurate (and most often, frustrating!)...


So, find a sticky note (big or small) and attach it to your paper you want to punch out...


Hold onto the sticky note and put the paper inside the punch...


And there you have it...


Now you can use every little last scrap of paper...even for punching.

If using a larger size sticky note, you can reuse it quite a few times before needing to get another one.

If you missed last week's Tuesday Tip, check it out HERE.

P.S. I think it's evident that I could really use a manicure! *wink*


* * * * * * * * * * * * * * * * * * * * * * * * * * * * *

**I have three "Create a Cupcake" cards to share with you from last night's card making night, so check back tomorrow!**
// ADDED BY RYAN ON 1-3-14 // END ADDED BY RYAN 1-4-14